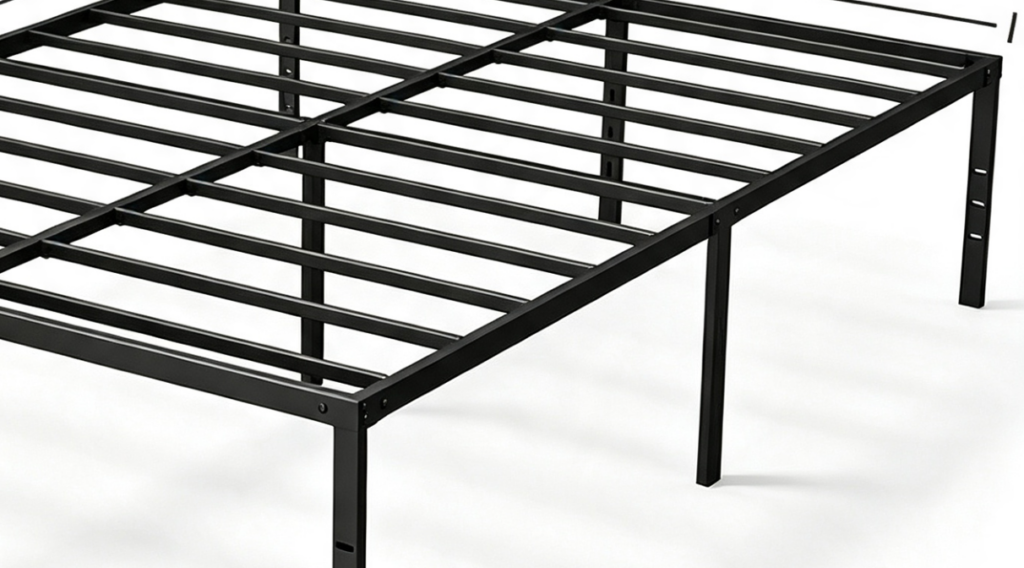
Platform Bed Series
Platform Bed Series — Modern minimalist design for contemporary bedroom.
Specifications
| Size | Metric | Imperial | Load Capacity |
|---|---|---|---|
| Single | 90×200 cm | 36×79 inch | 150 kg |
| Double | 140×200 cm | 55×79 inch | 180 kg |
| Queen | 160×200 cm | 63×79 inch | 200 kg |
1Installation Video
Best viewed fullscreen; it loops automatically.
2Installation Manual PDF (T-42 to T-45 Series)
This PDF carries the TULOGCO anti-counterfeit watermark. Click the thumbnail to enlarge, with paging and fullscreen support.


3Step-by-Step Installation Guide
Every step with its own illustration and explanation.
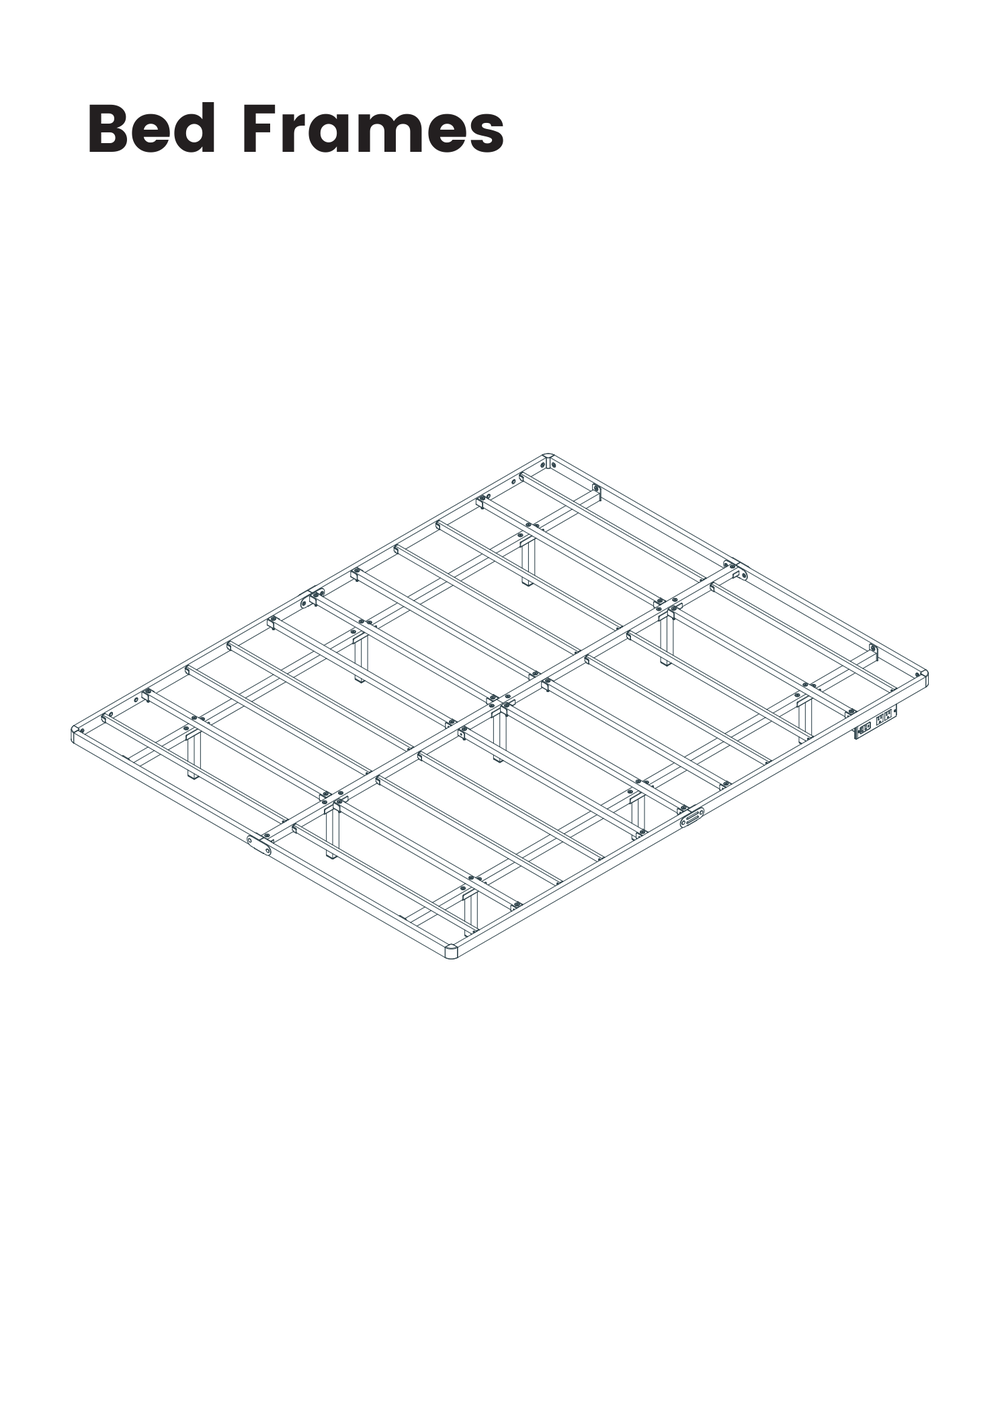
1Product Series (Bed Frames)
Overview of the T-42 to T-45 bed frame series across all available sizes
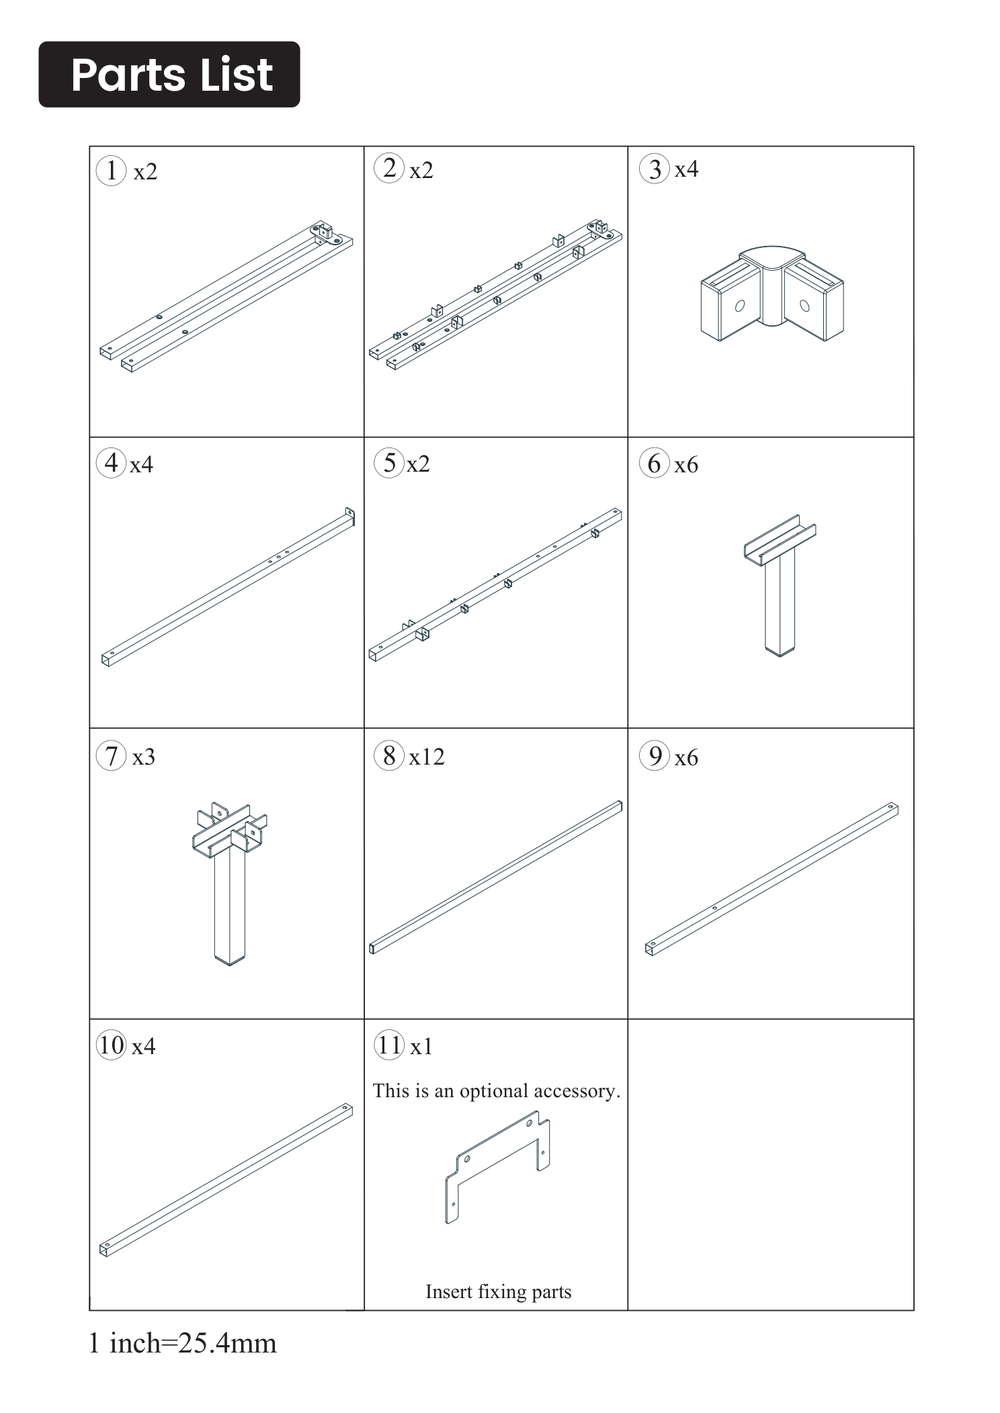
2Parts List
Full breakdown of every screw, tube and slat included
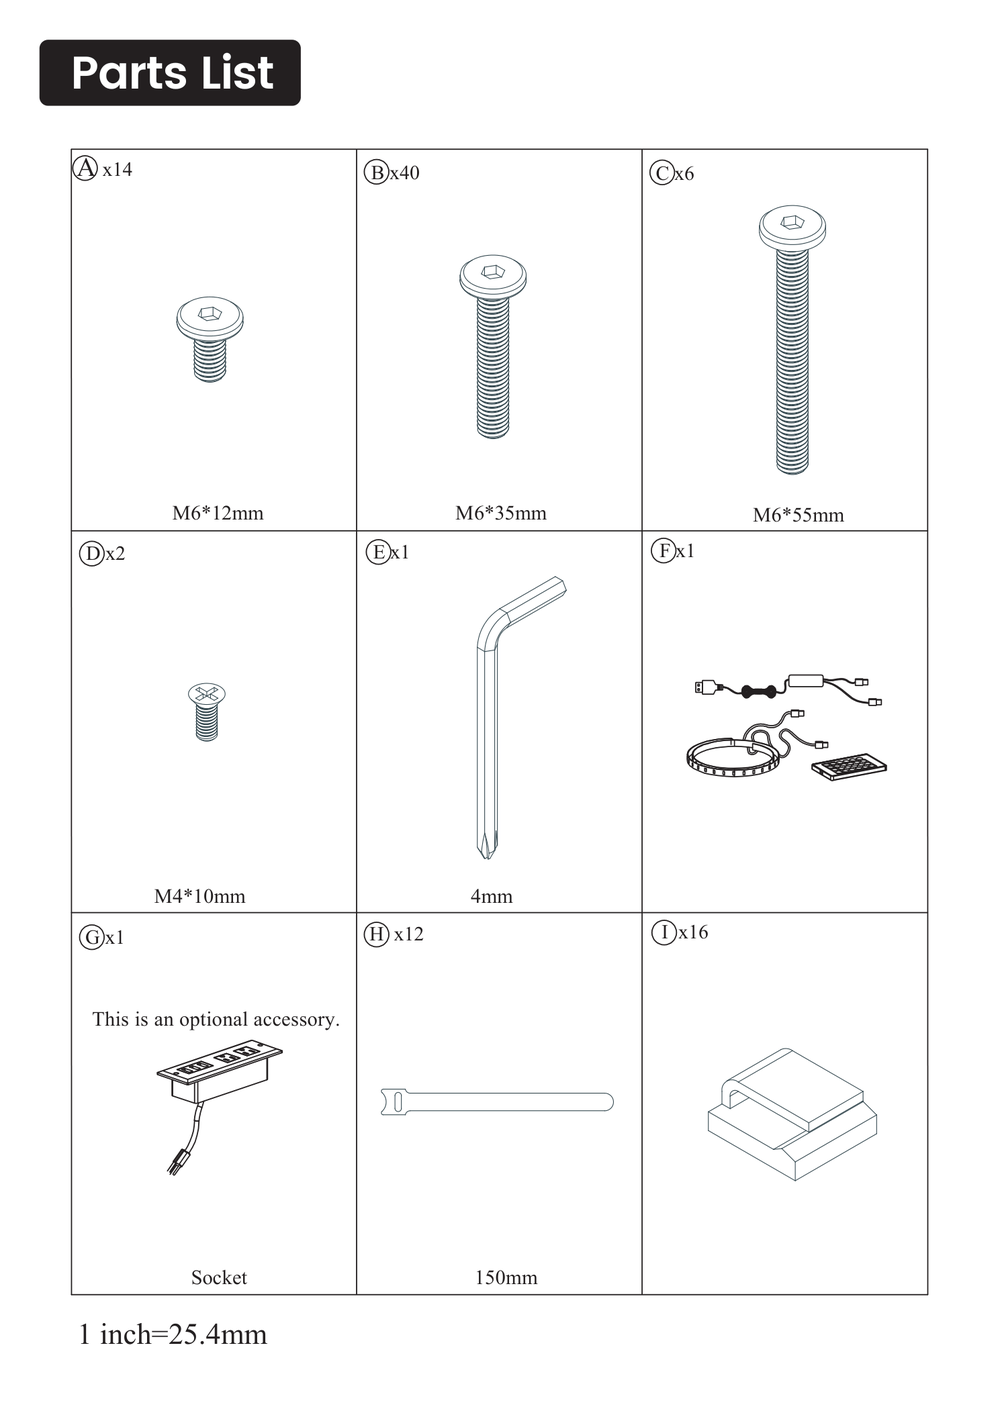
3Part Details (B ×40)
Detailed specification of the B type parts (40 pieces)
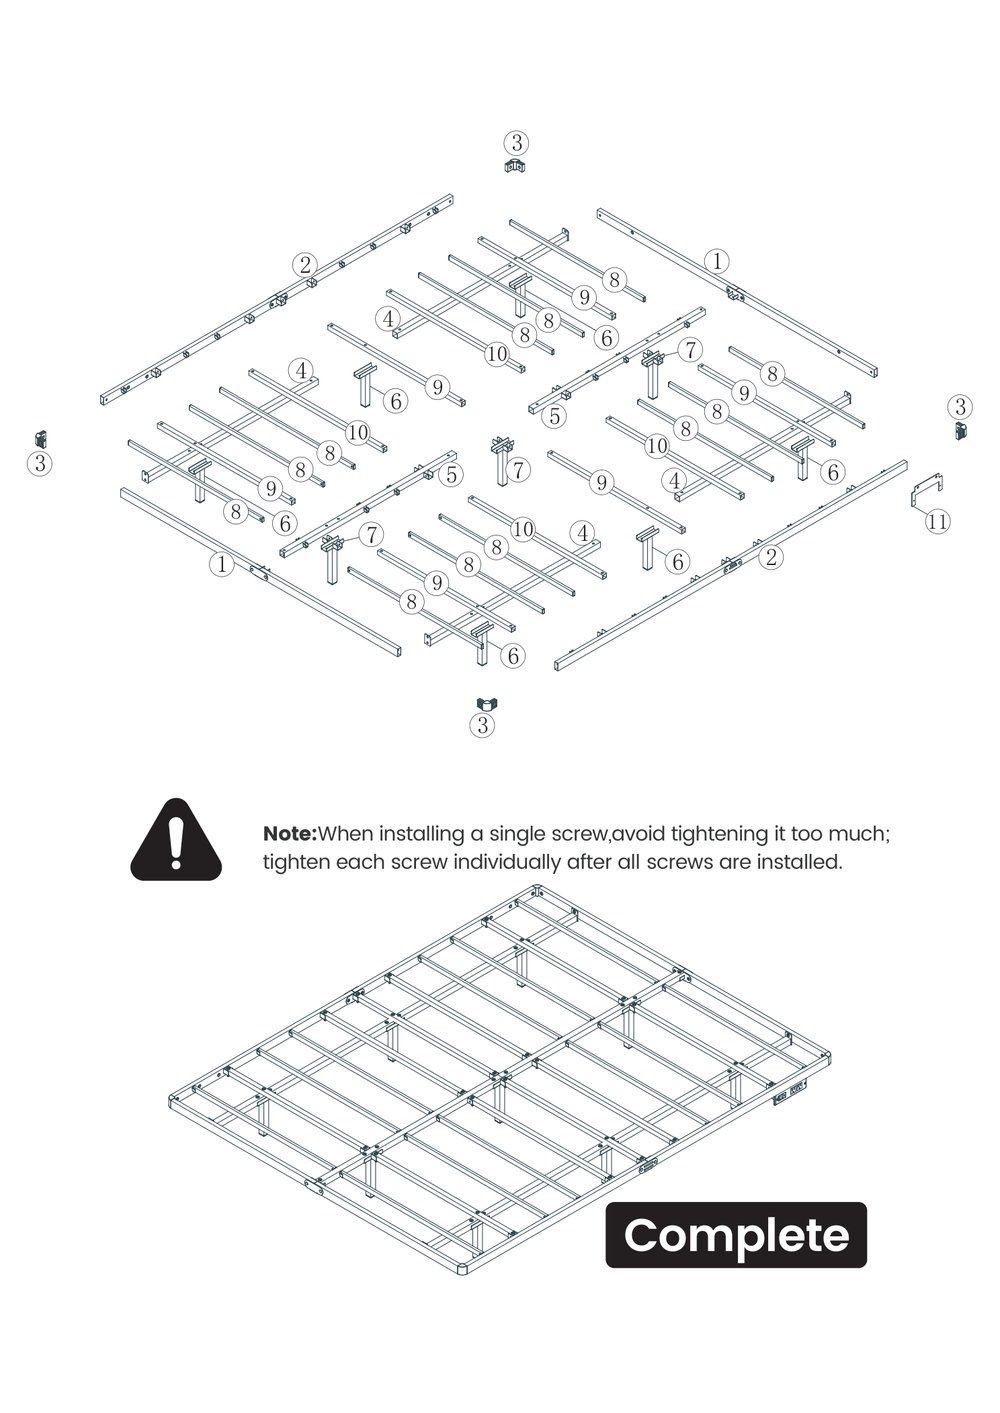
4Complete View
Overall look of the fully assembled bed
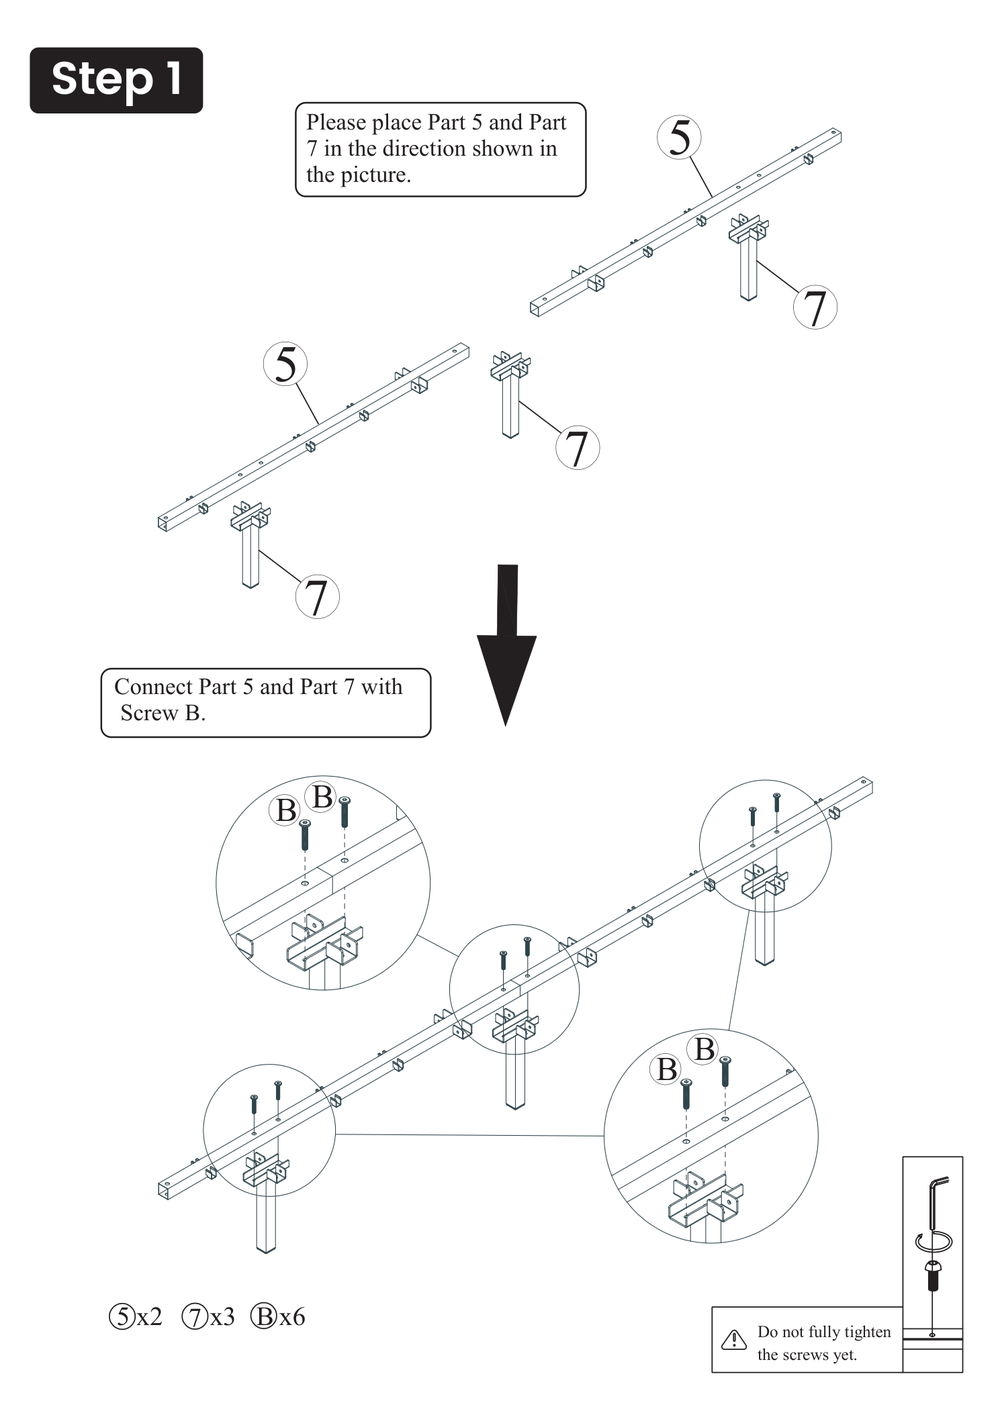
5Step 1 — Main frame
Assemble the main frame structure
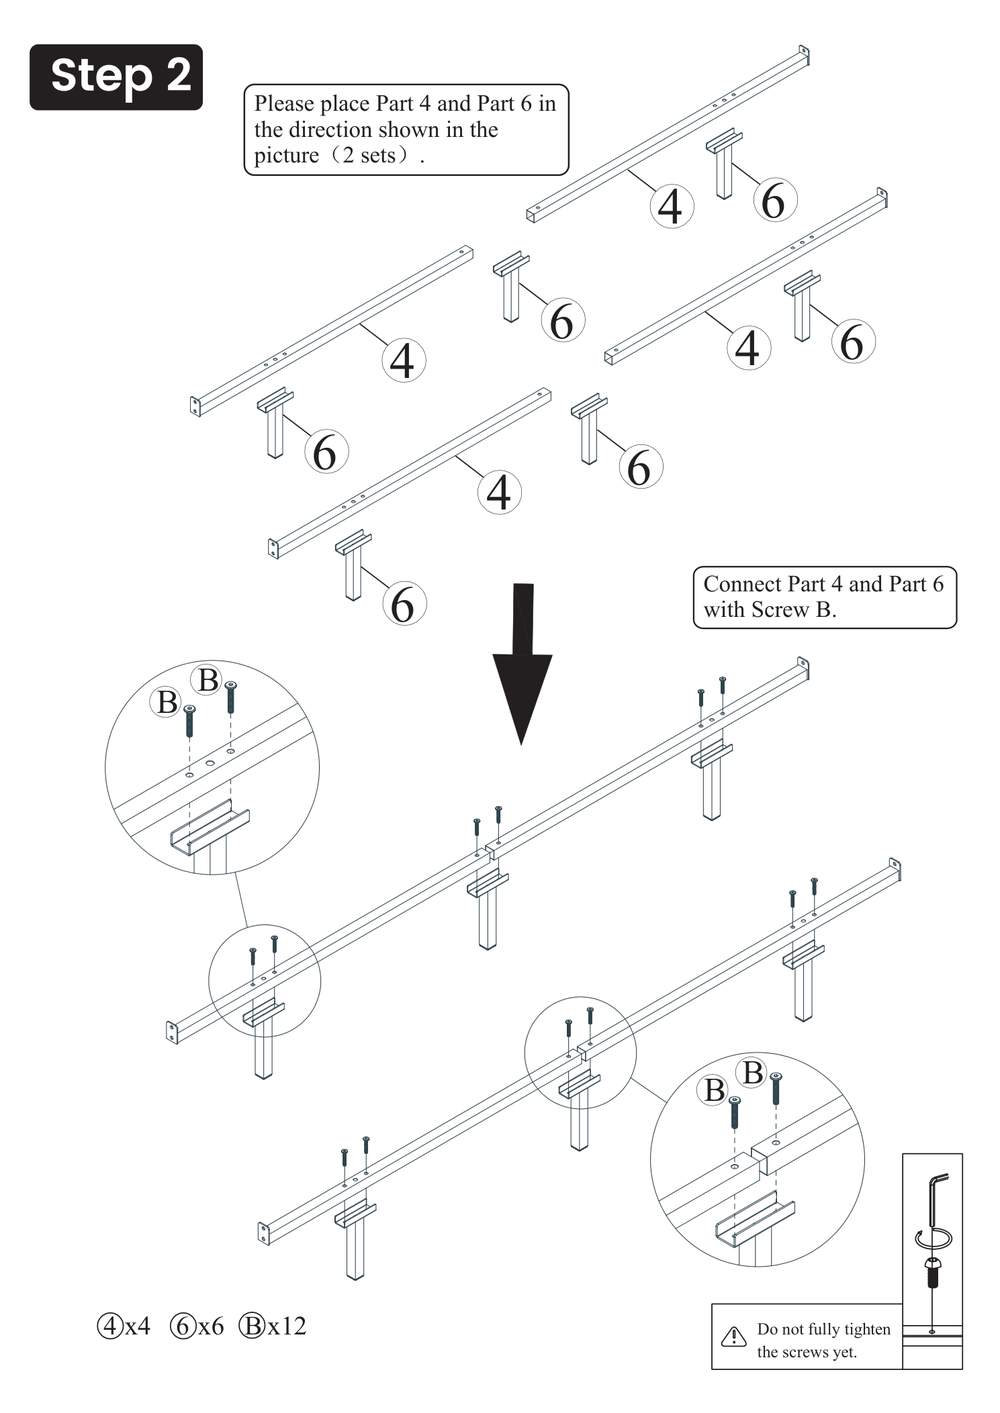
6Step 2 — Cross rails
Fit the front and rear cross rails to lock the frame together
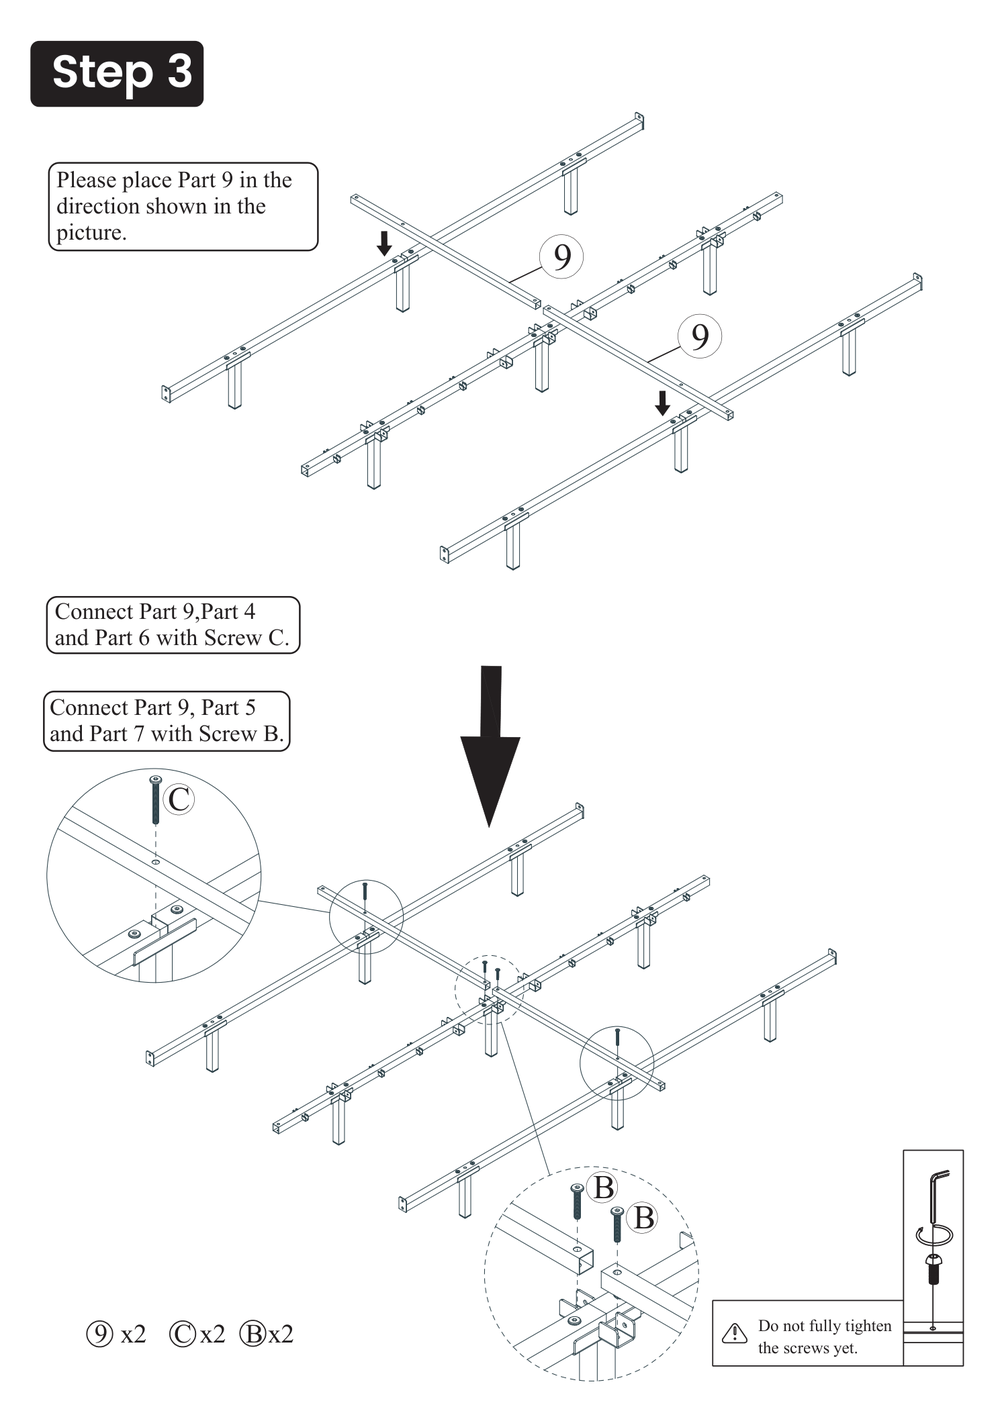
7Step 3 — Footboard connection
Pre-connect the footboard side rails to the uprights
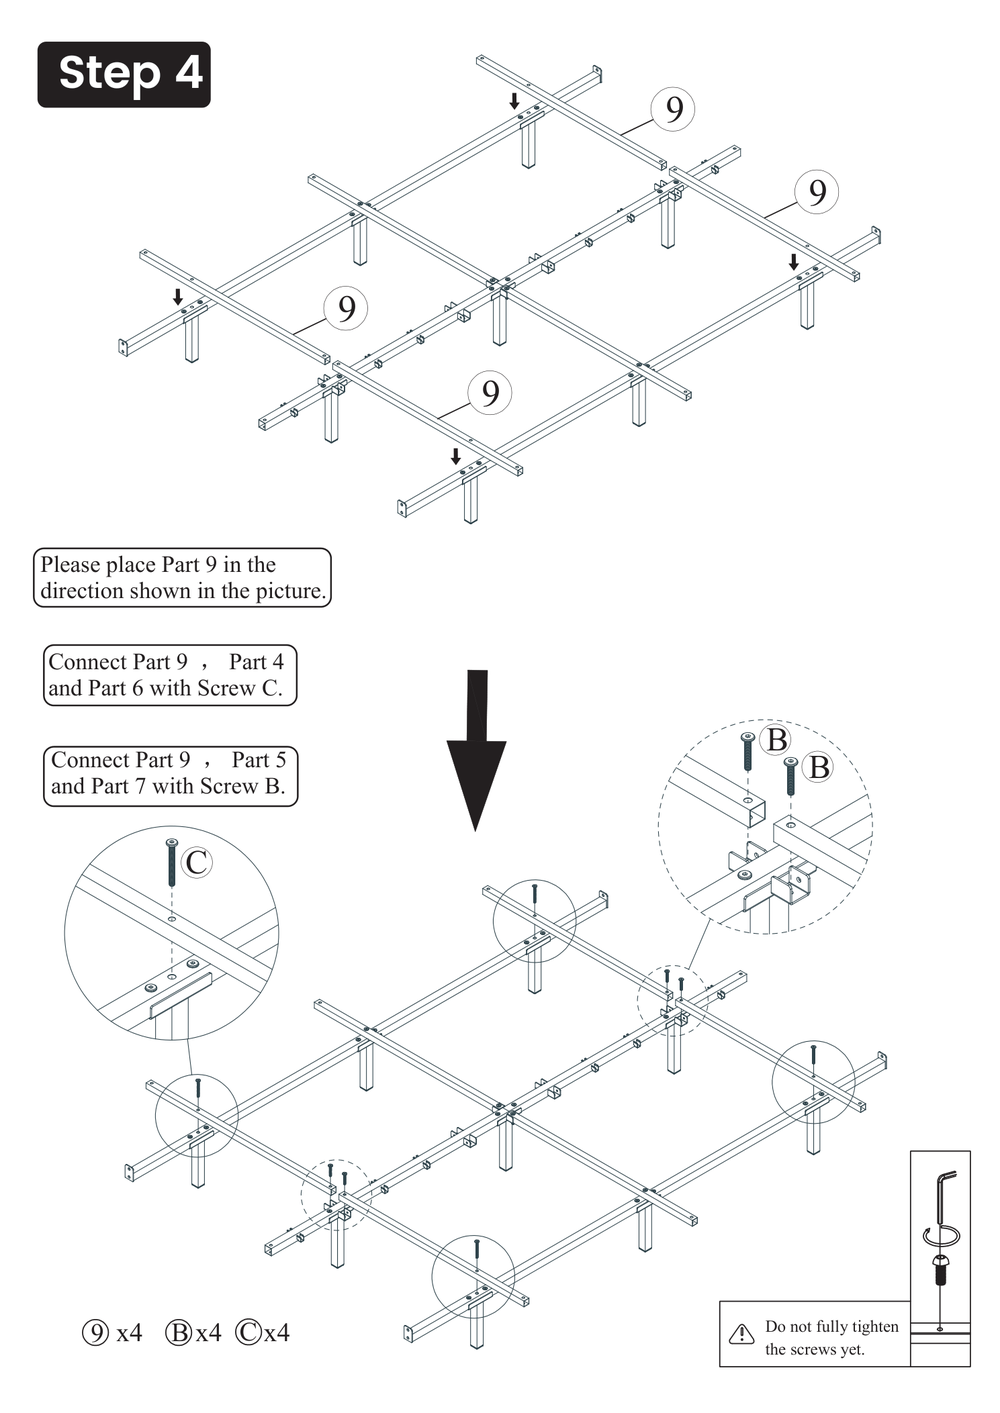
8Step 4 — Secure side rails and uprights
Fix the side rails to the uprights with M6×55mm screws
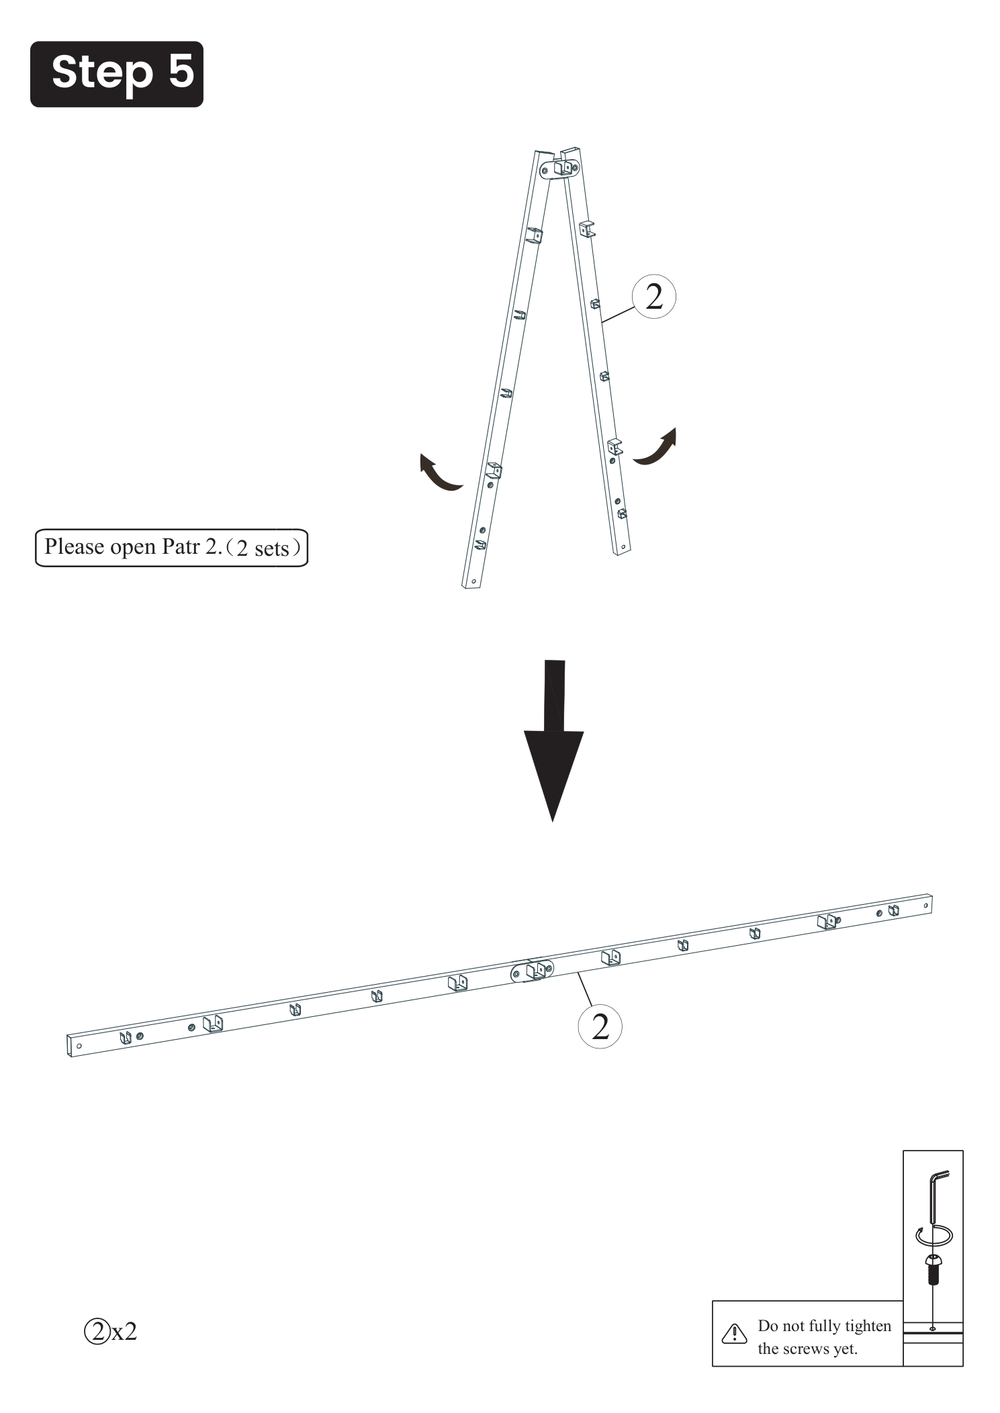
9Step 5 — Slat supports
Slot the slat supports into the side rail channels
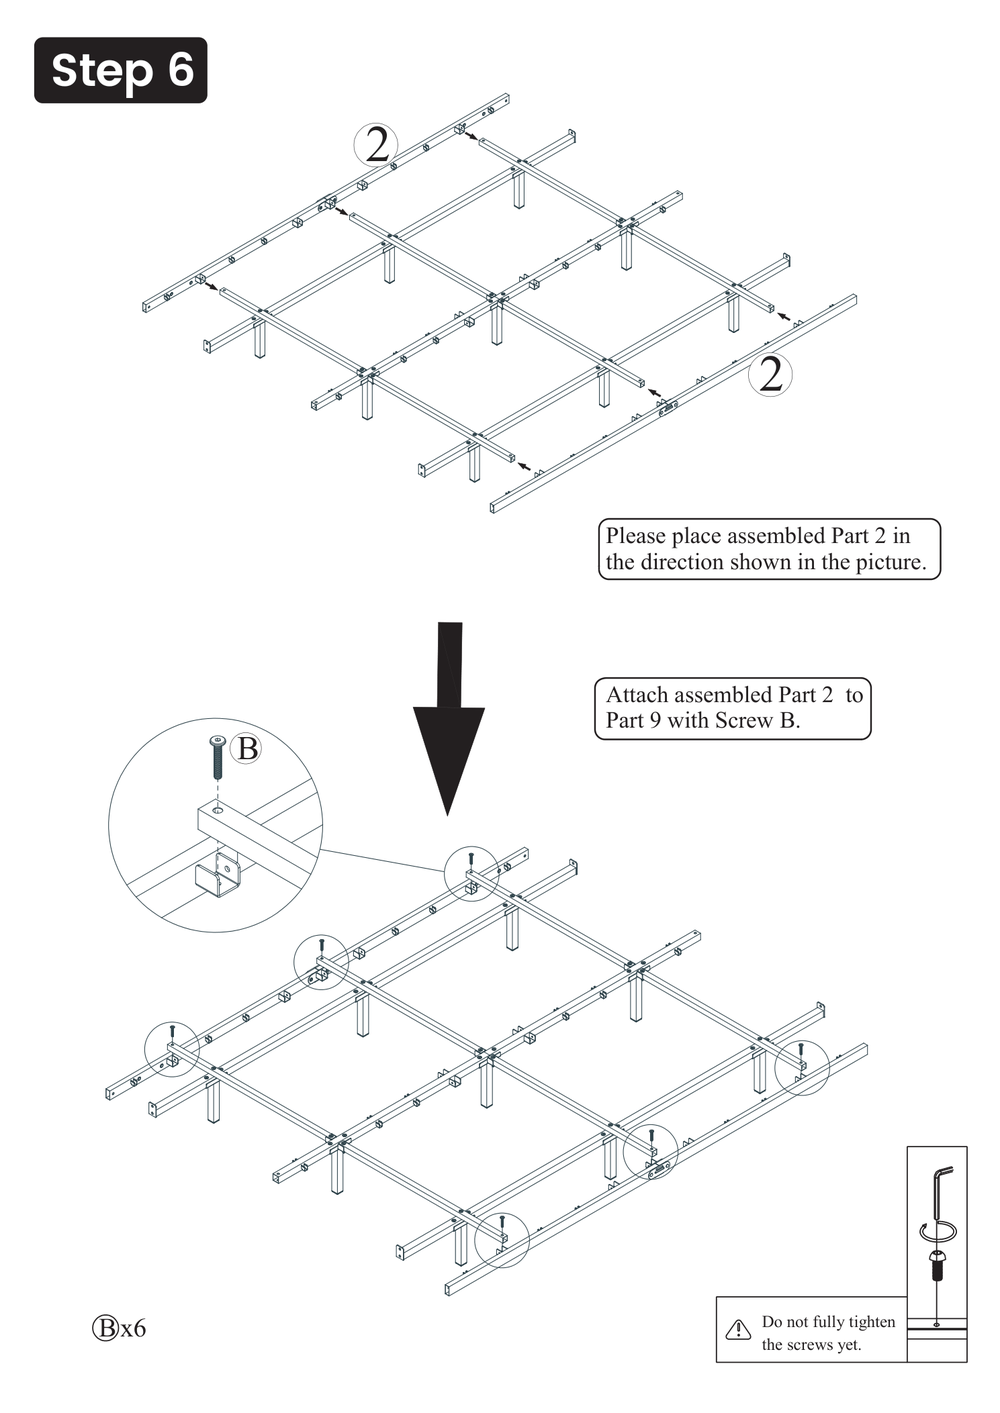
10Step 6 — Lay the slats
Place the slats onto the supports
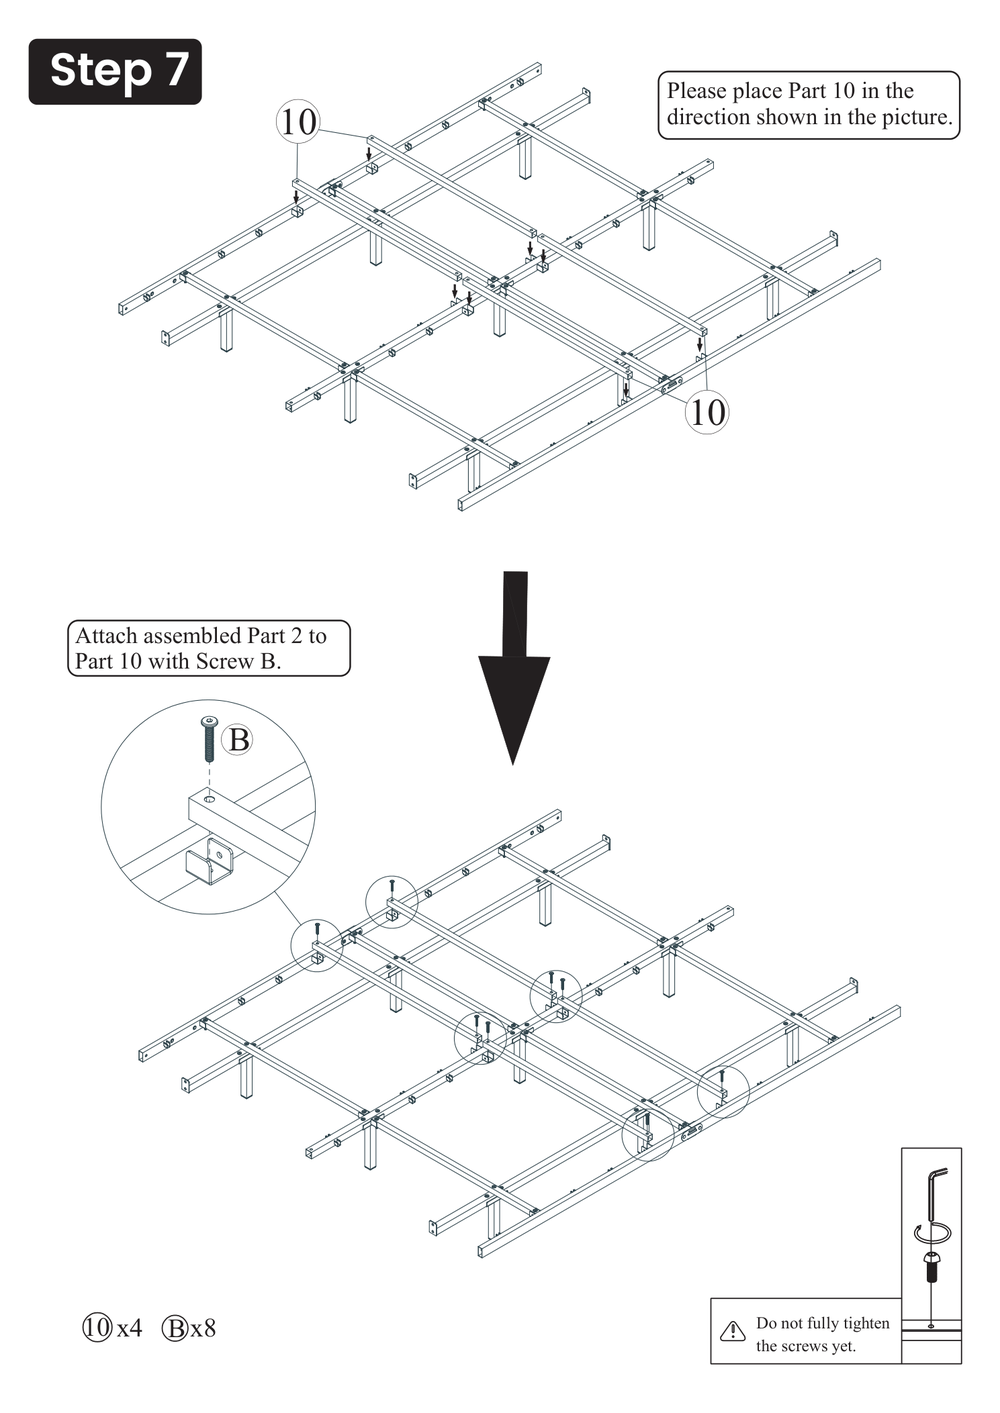
11Step 7 — Tighten the frame
Tighten all screws in a diagonal sequence
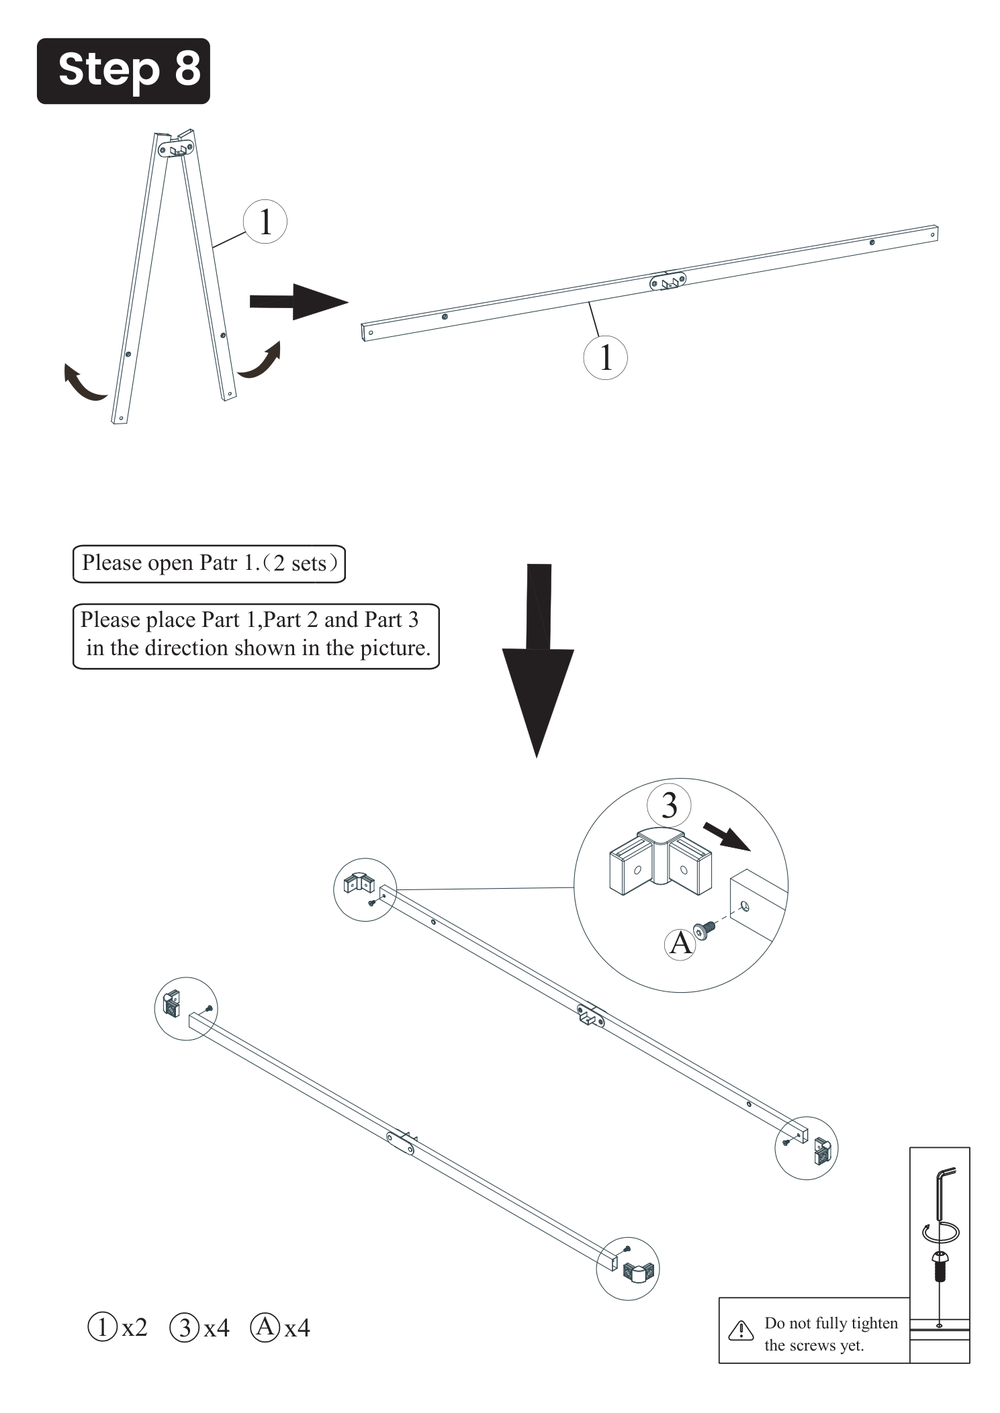
12Step 8 — Reinforce the centre support
Secure the centre upright for added support
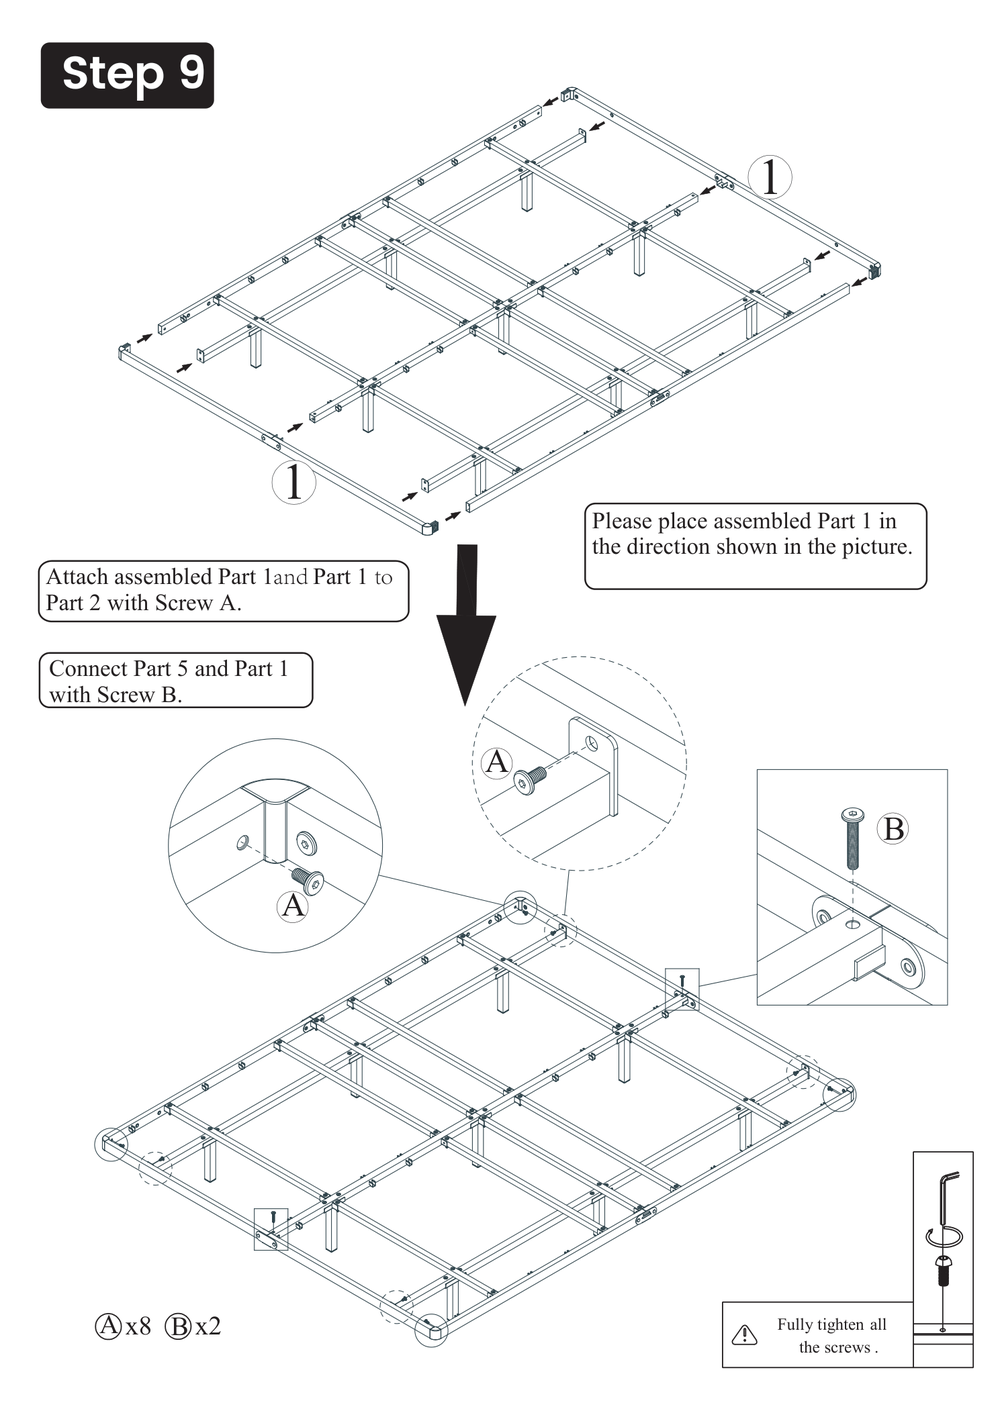
13Step 9 — Check level
Use a spirit level to confirm the frame is level
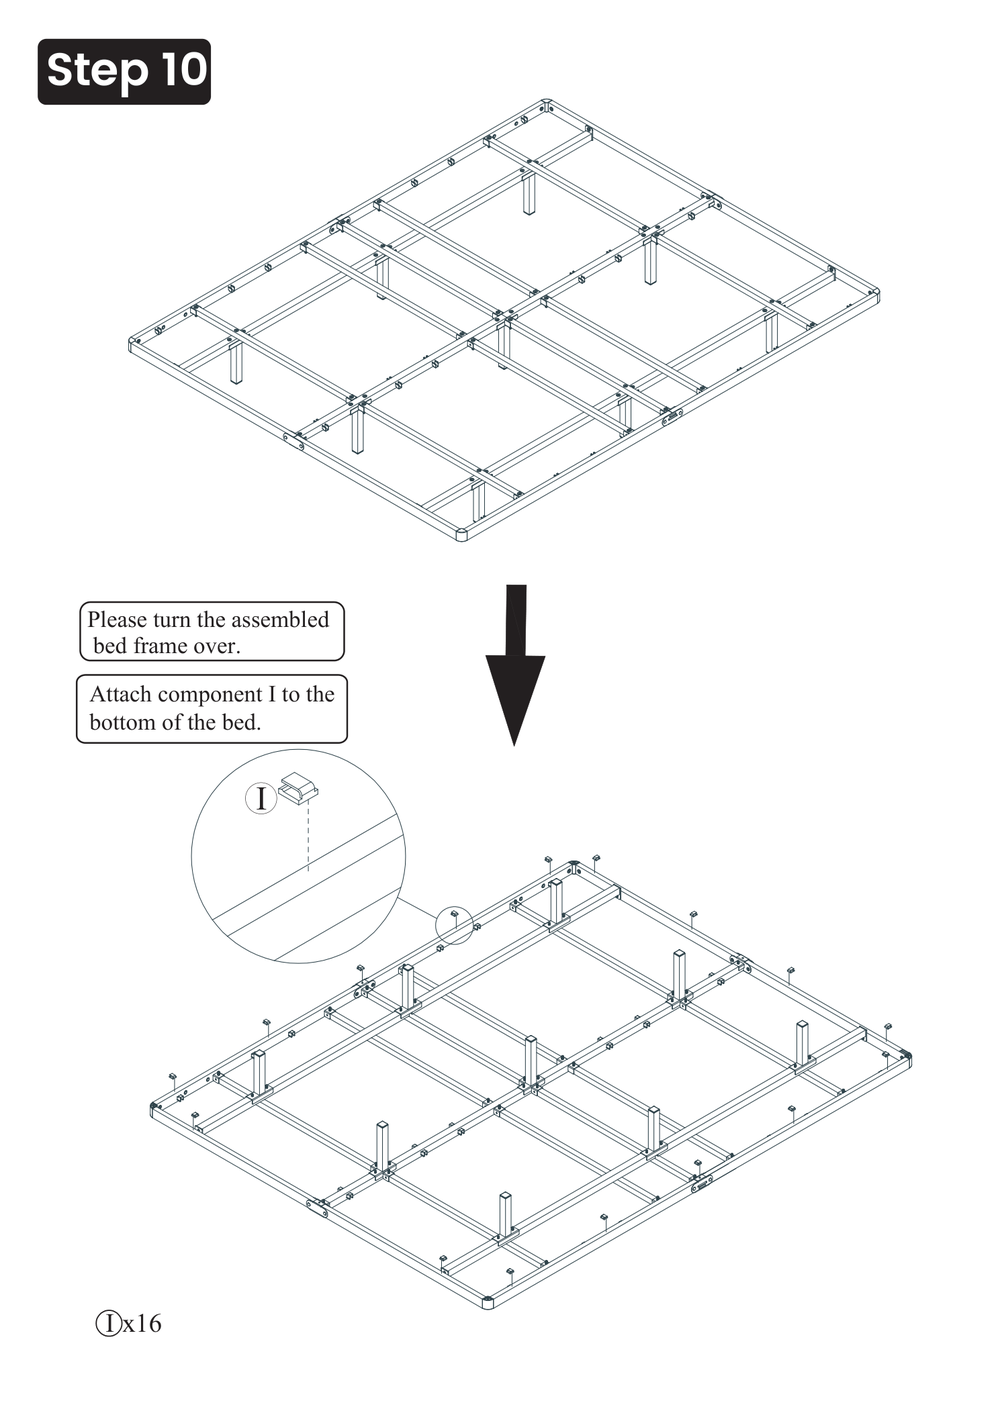
14Step 10 — Final tightening
Tighten every screw to 100% torque
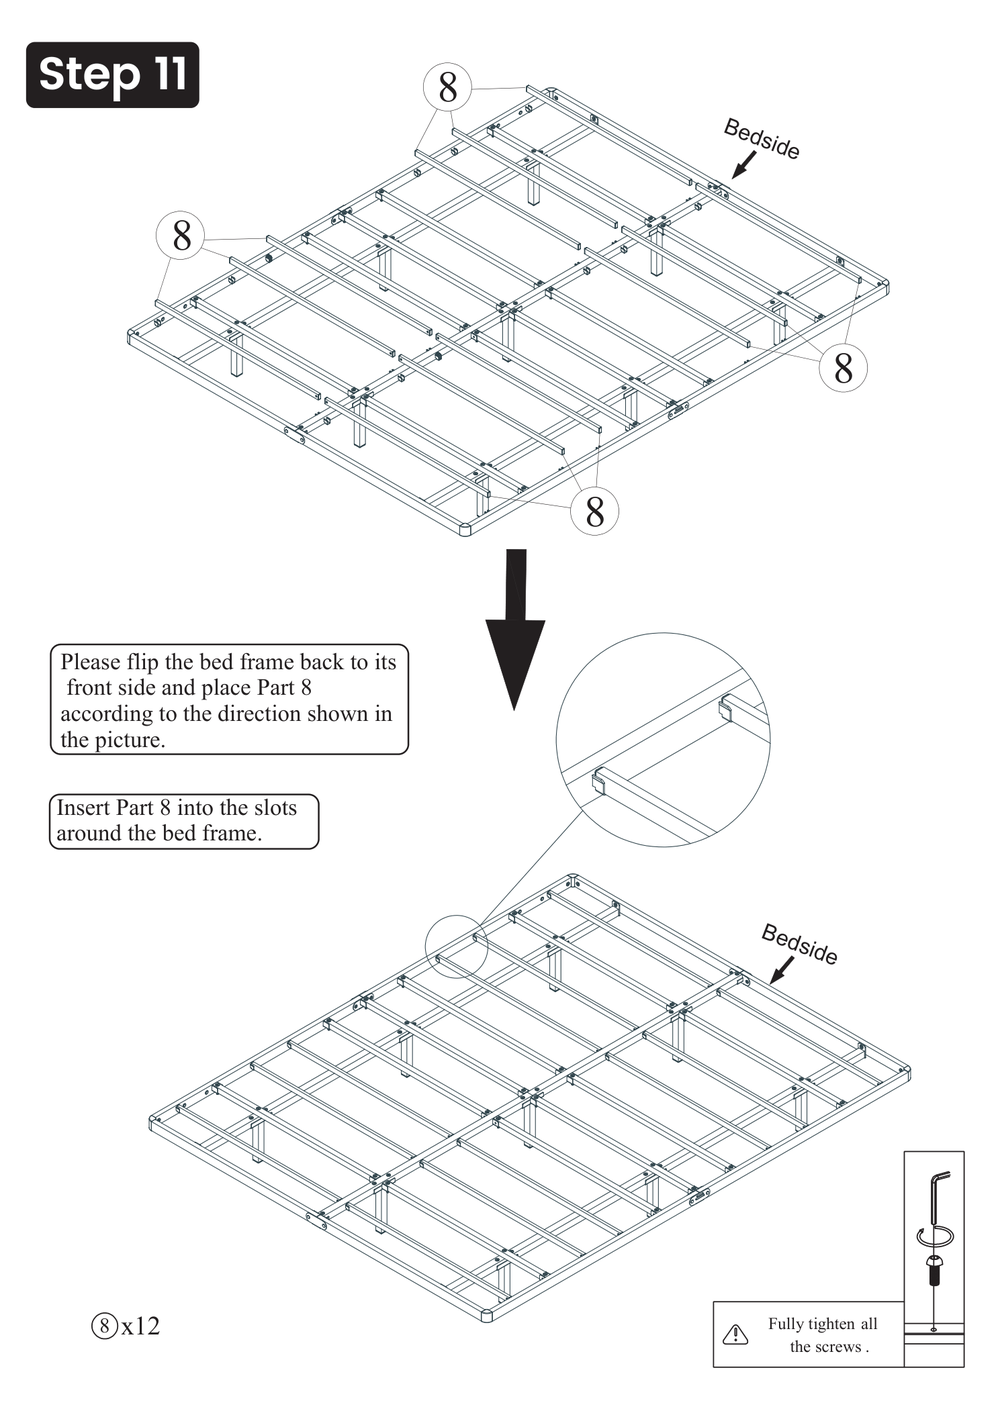
15Step 11 — Align the slats
Align each slat with its neighbour
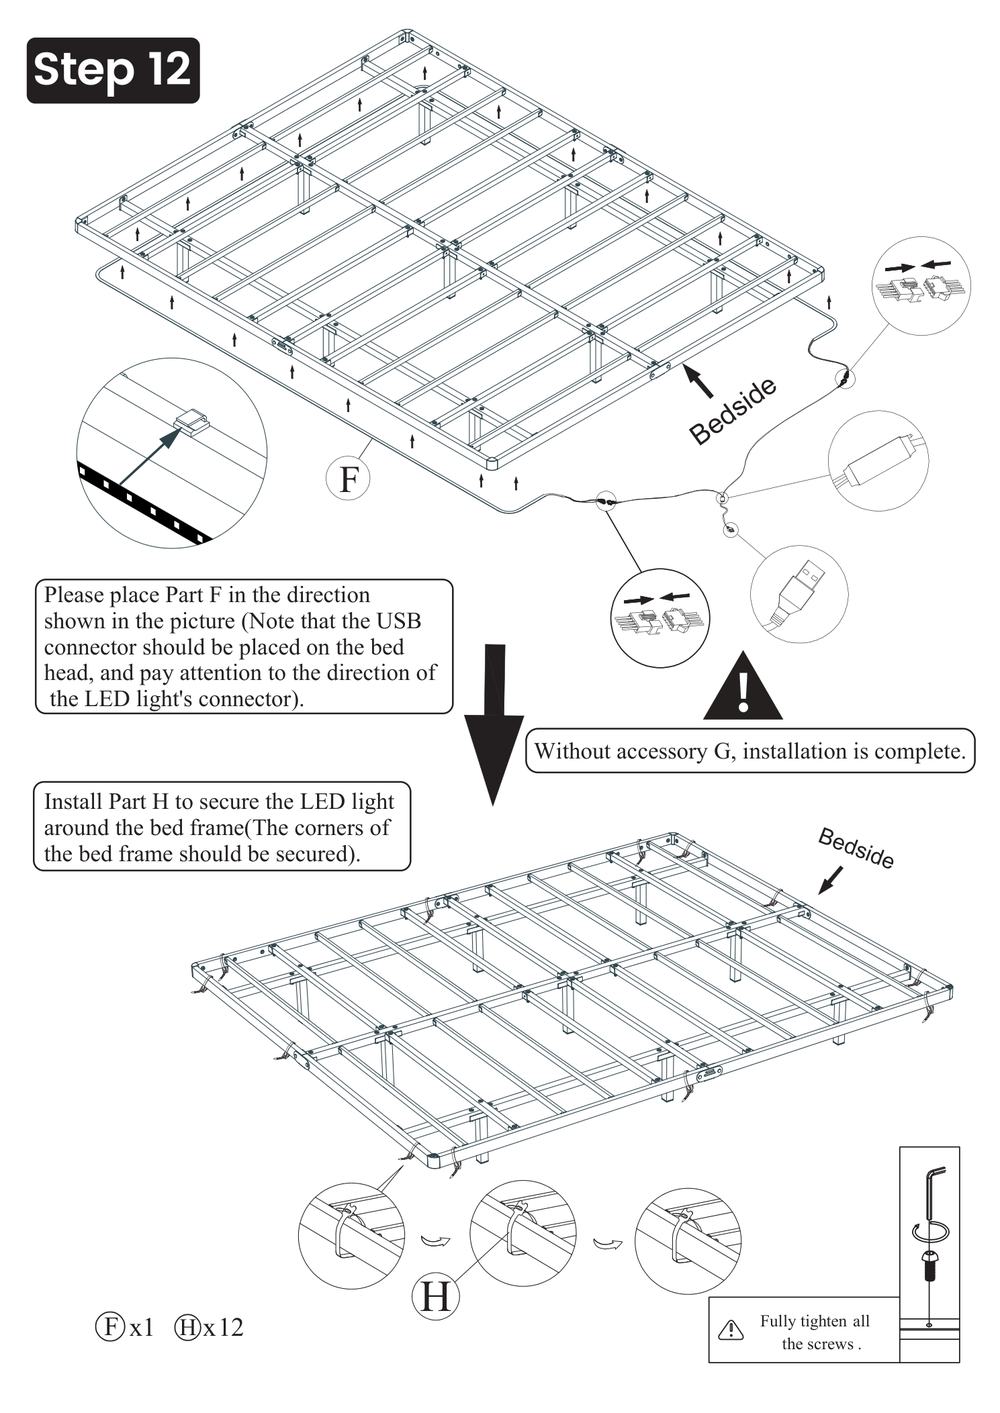
16Step 12 — Safety check
Verify that every connection is secure
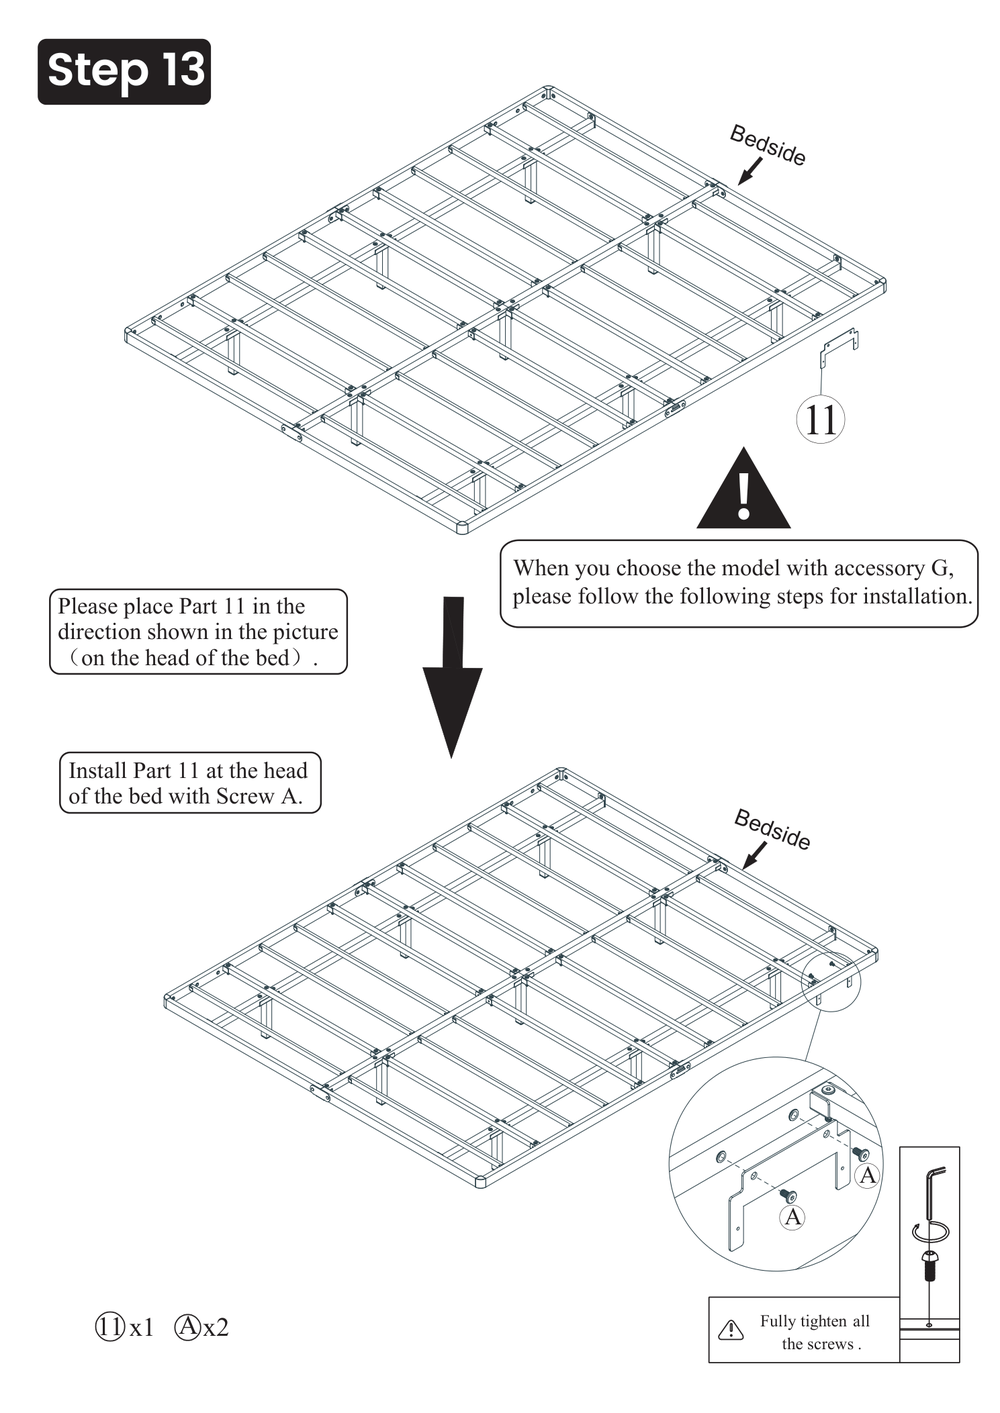
17Step 13 — Fit the non-slip pads
Attach the non-slip pads to the bottom of the legs
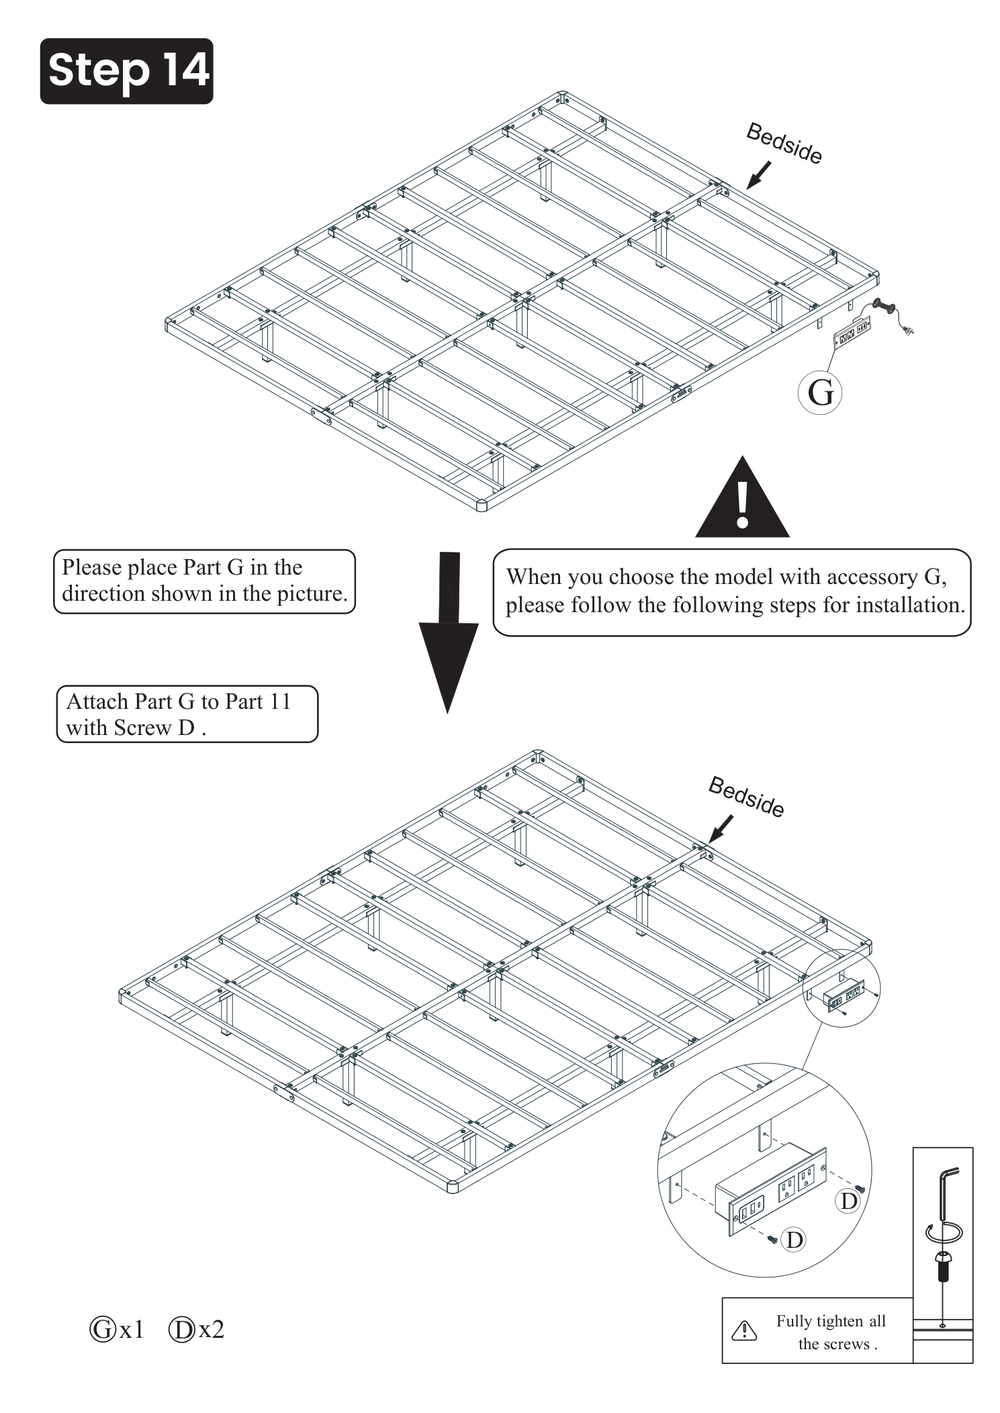
18Step 14 — Finished and checked
Final inspection of the completed bed
4Important Notes
Follow the assembly steps to make sure the product is stable.
✓ Correct Method
Use a combination of a power drill and a torque wrench.
✗ Wrong Method
- Skip the pre-assembly connection step and tighten directly, which misaligns the screw holes.
- Place items on the bed that exceed the load capacity limit.
- Use in a damp environment, which causes the metal parts to rust.
Need more help?
留下你的信息,我们通过邮箱回复你。