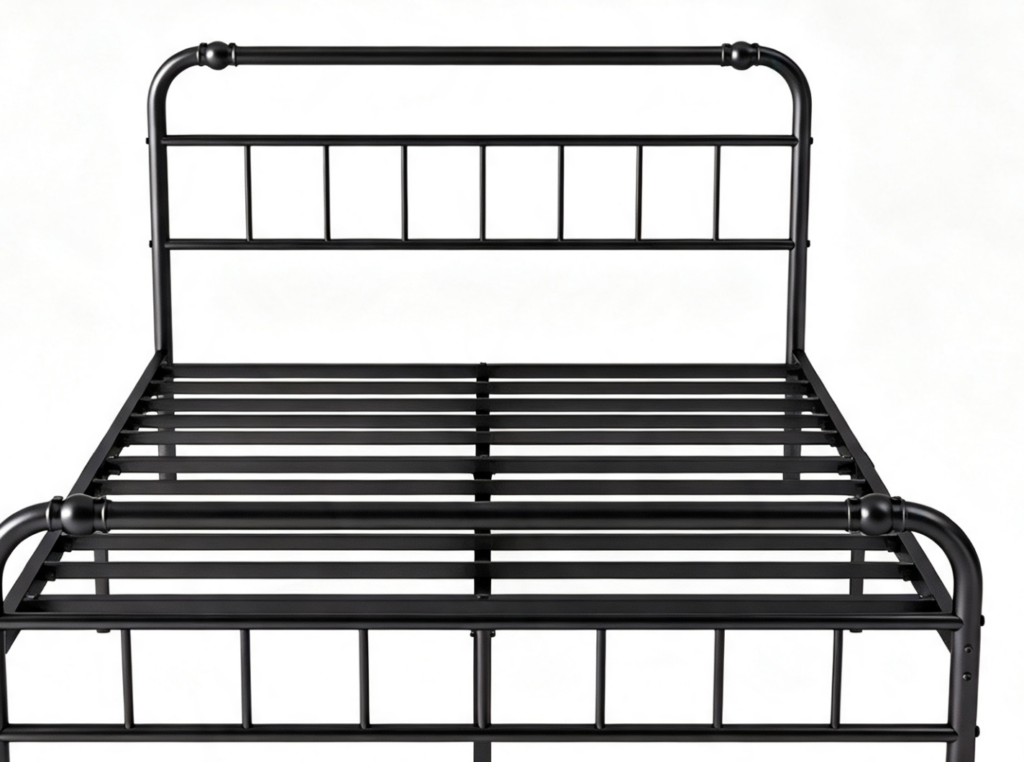
Headboard Bed
Iron Bed Frame with Headboard — Simple versatile style for bedroom, apartment & rental house decor.
Specifications
| Size | Metric | Imperial | Load Capacity |
|---|---|---|---|
| Single | 90×190 cm | 36×75 inch | 150 kg |
| Double | 135×190 cm | 54×75 inch | 200 kg |
| Queen | 150×200 cm | 60×79 inch | 250 kg |
1Installation Video
Best viewed fullscreen; it loops automatically.
2Installation Manual PDF (T36 Headboard Bed)
This PDF carries the TULOGCO anti-counterfeit watermark. Click the thumbnail to enlarge, with paging and fullscreen support.


3Step-by-Step Installation Guide
Every step with its own illustration and explanation.
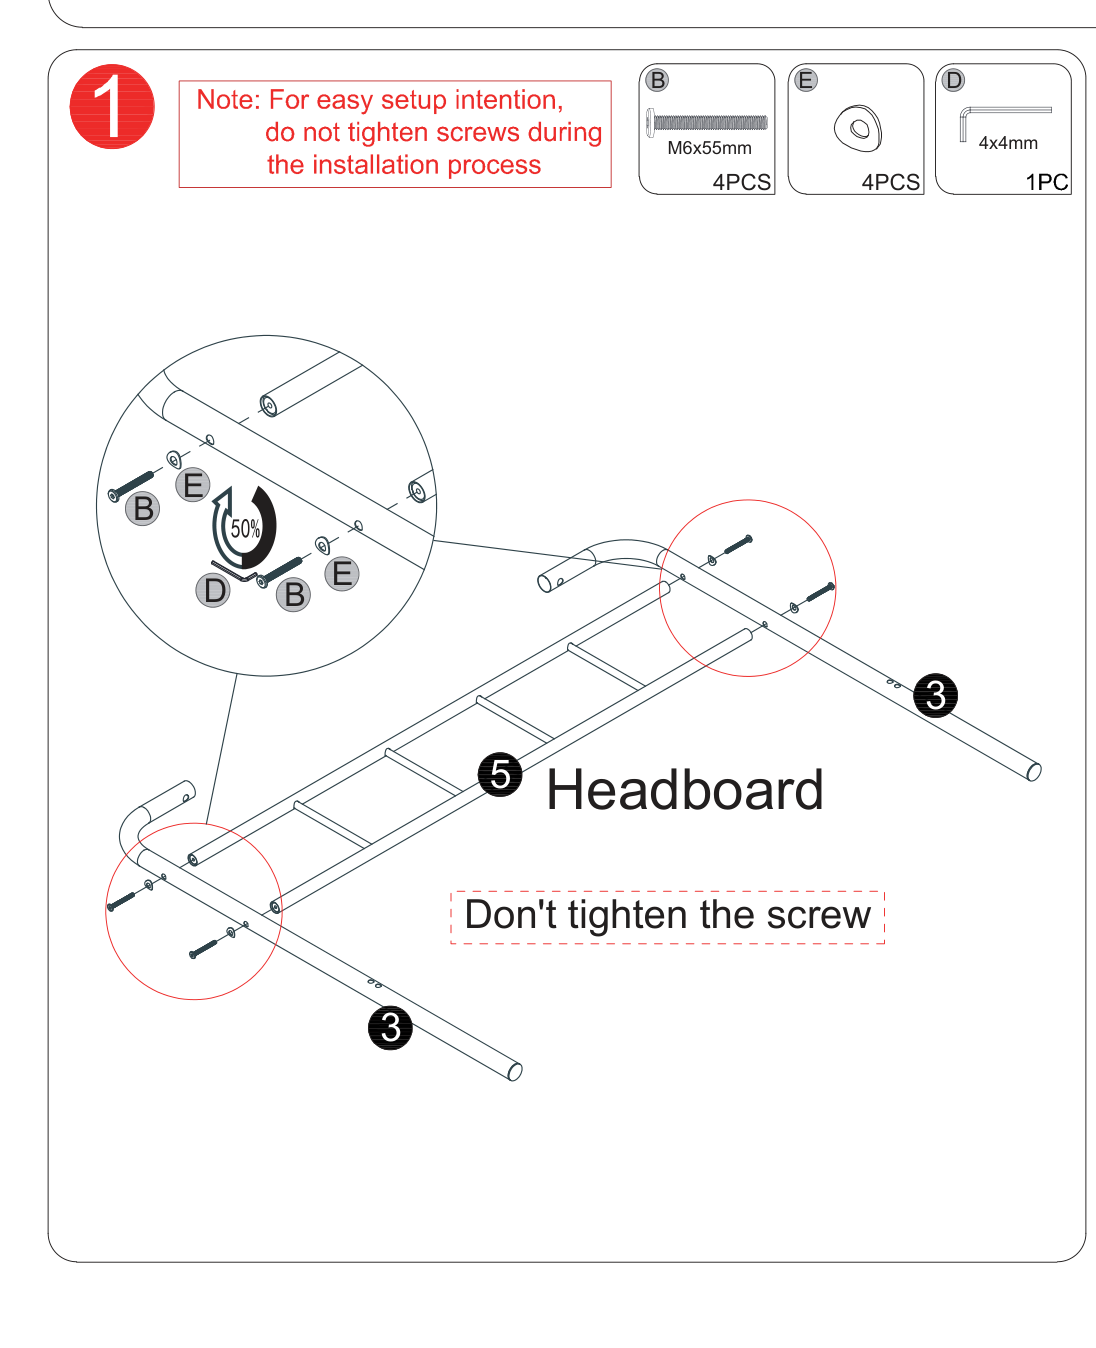
1Pre-connect headboard and side rails
Pre-connect side rail ③ and headboard tube ⑤ using B (M6×55mm) screws, E washers and the D (4×4mm) hex key.
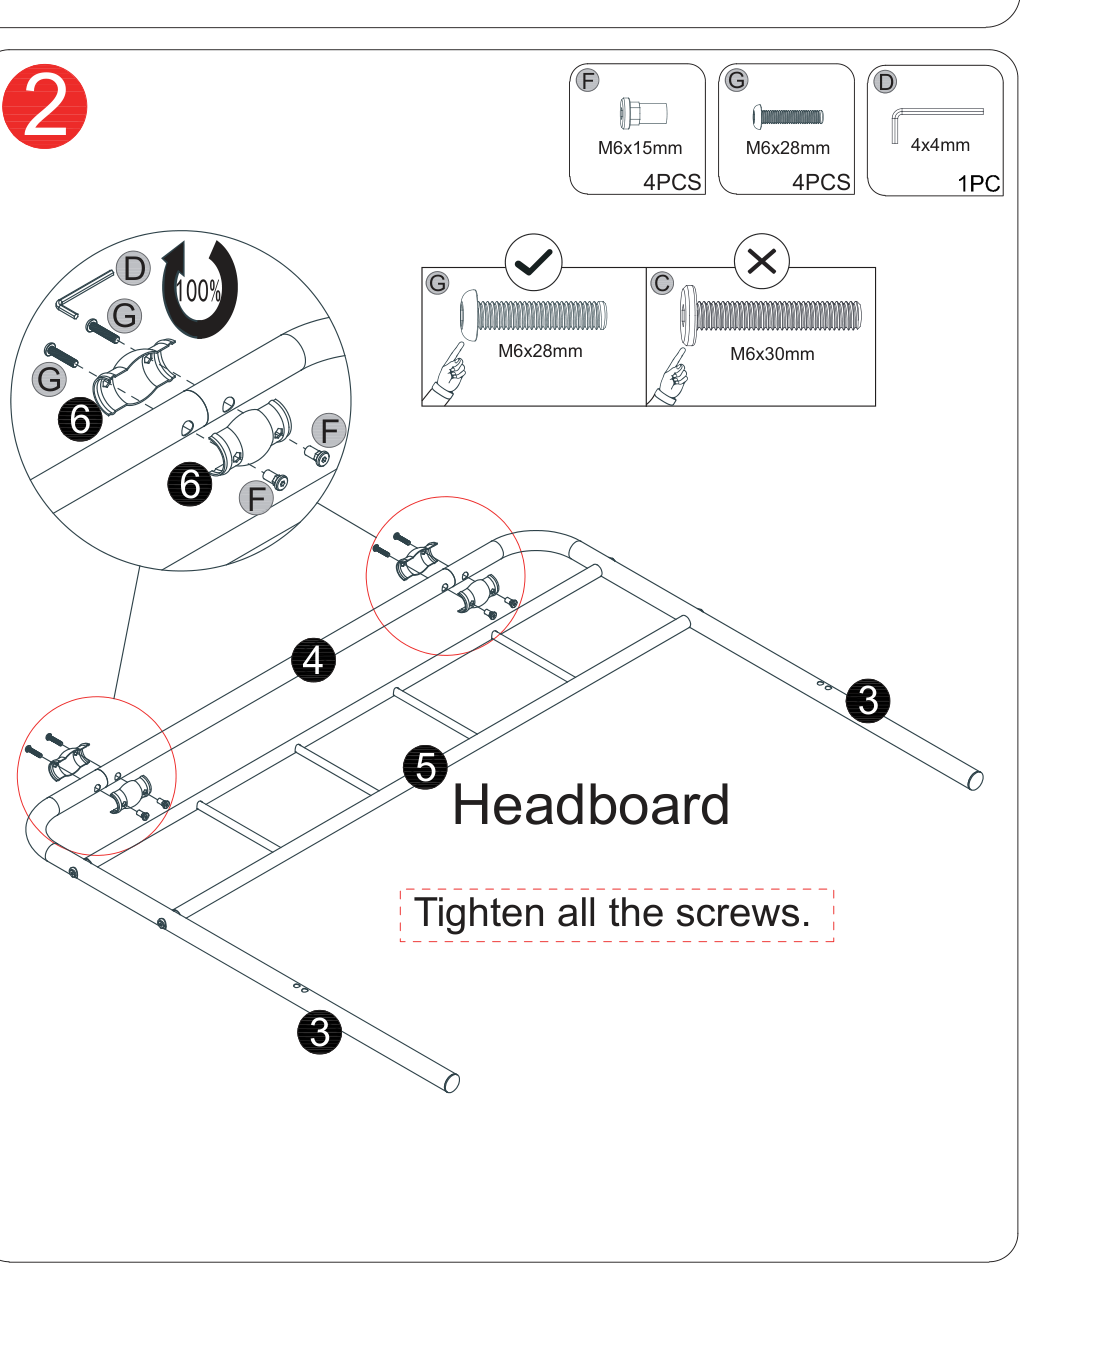
2Secure the headboard assembly (50% → 100%)
Tighten the pre-connected headboard assembly to 50% using G (M6×28mm) / C (M6×30mm), check the alignment, then tighten to 100%.
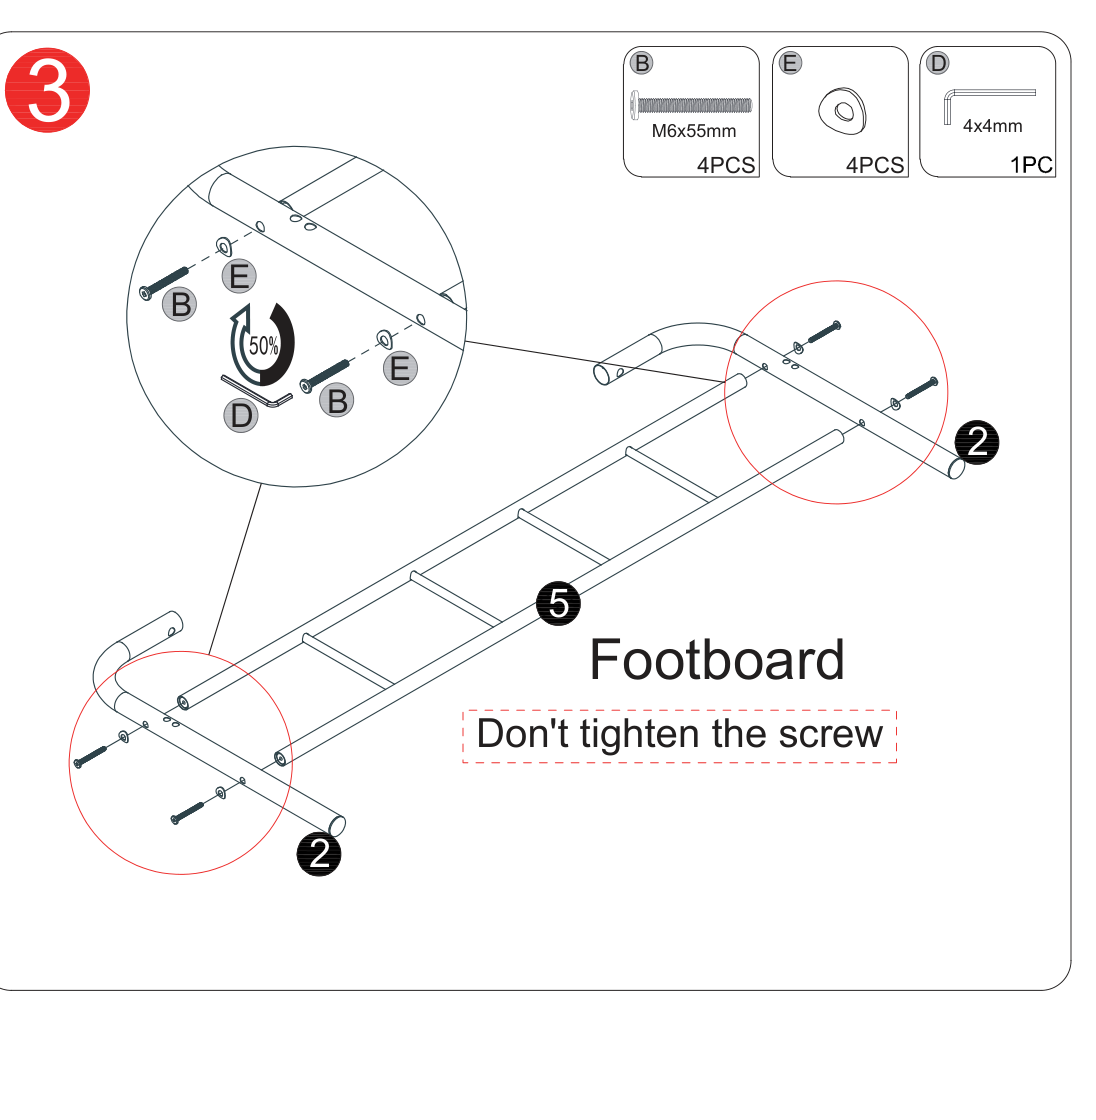
3Join the main frame and cross rails
Align the main frame with the secured headboard assembly and fit the A / B screws into the holes shown.
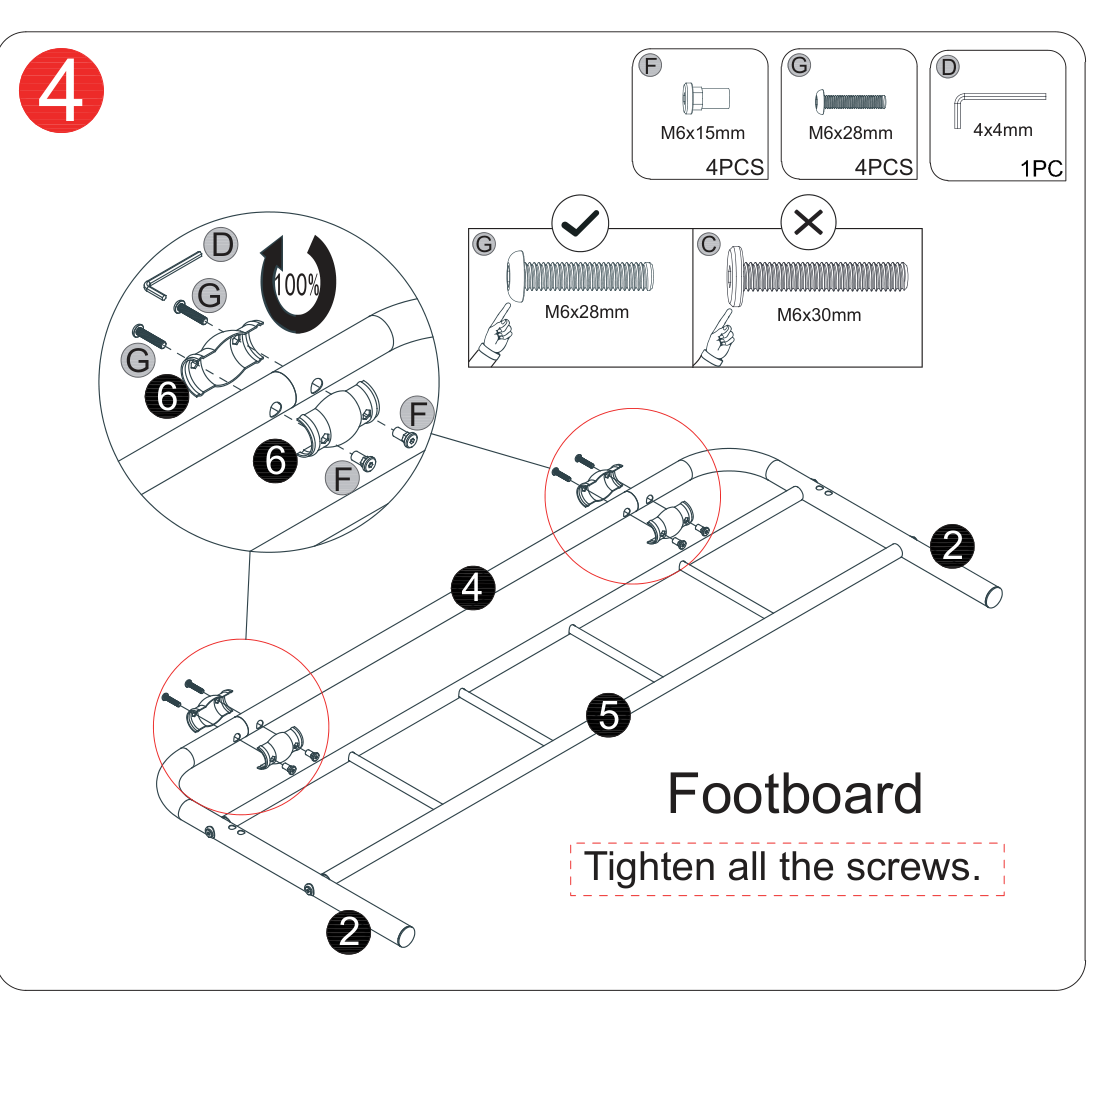
4Connect side rails and position the slat supports
Fit the side rails, align them with the slat support holes and secure with the matching screws.
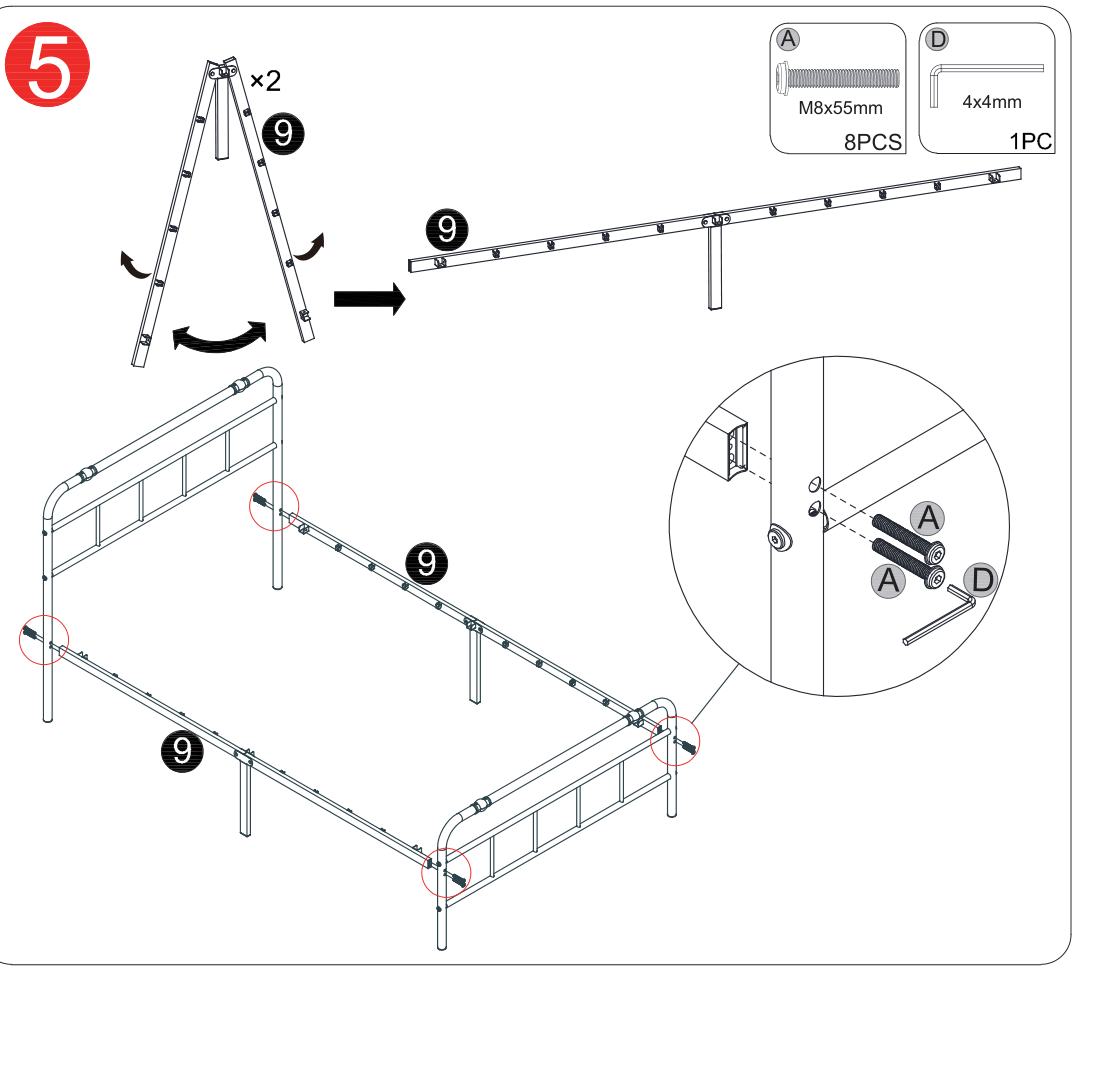
5Install the slat supports
Install all slat supports along the inside of the frame at even spacing.
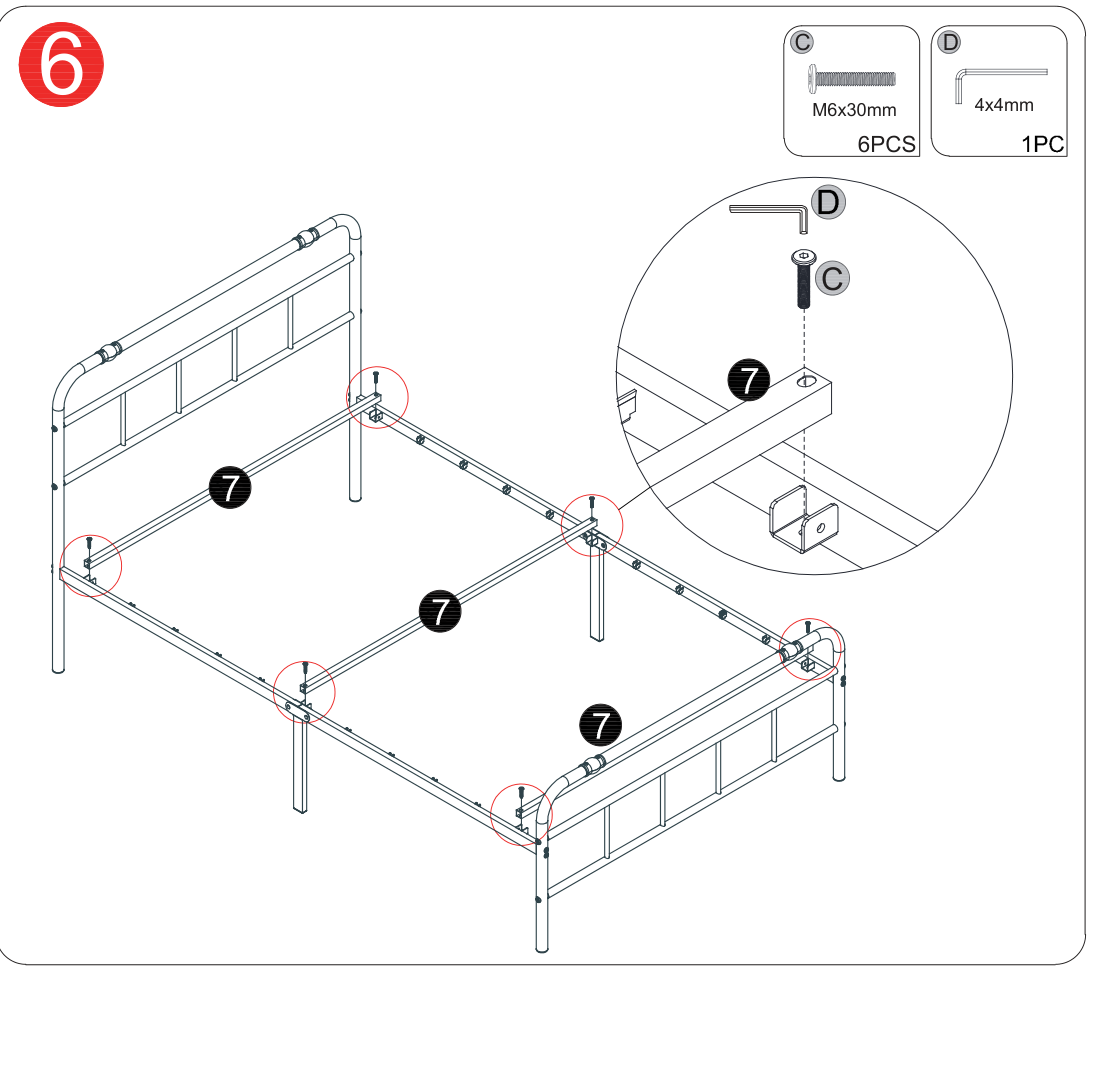
6Lay the slats
Lay the slats one by one from the headboard toward the footboard, following the numbered order.
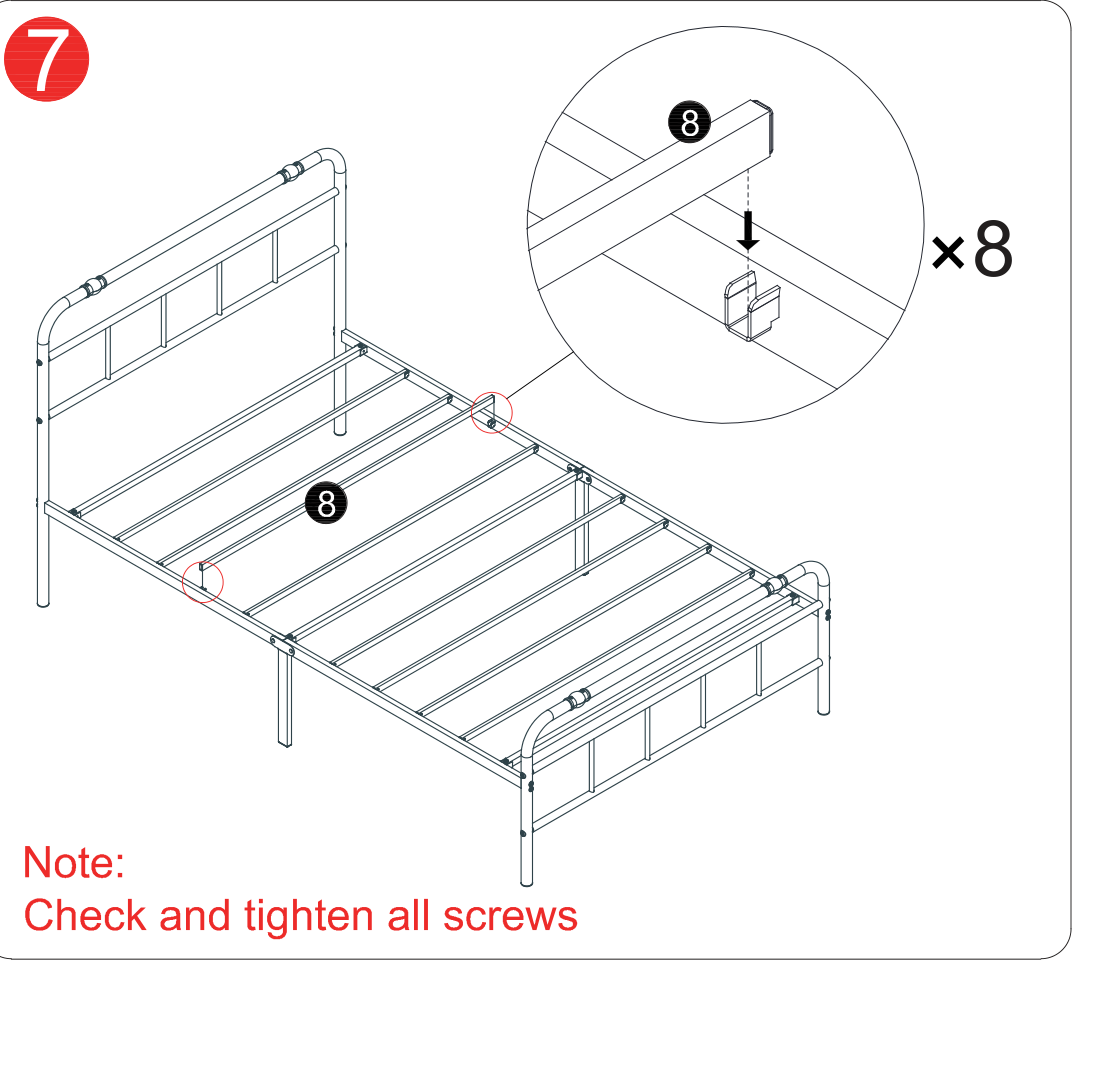
7Final check and 100% tightening
Once every part is in place, tighten all screws to 100% working in a diagonal sequence.
4Important Notes
Read this section carefully before assembly to avoid damaging the product or causing personal injury.
✓ Correct Method
Follow the manual steps strictly and use the appropriate tools.
✗ Wrong Method
- Tighten the screws by force, which can strip the threads or deform the bed frame.
- Skip the assembly steps and install directly, which makes the structure unstable.
- Jump on the bed to test the load capacity, which risks damaging the bed.
- Use mismatched screw sizes, which may cause loose joints.
Need more help?
留下你的信息,我们通过邮箱回复你。